
Nun’s Puffs Recipe: Delicate, Airy Pastries You’ll Love Baking
Welcome to a treat that feels like it flew straight out of a French patisserie and into your kitchen! Today, we’re exploring the Nun’s Puffs Recipe—a beloved classic that has enchanted dessert lovers around the world for centuries. A true marvel of simple ingredients and time-honored technique, Nun’s Puffs (or “pets de nonne” in their native French) are heavenly, light-as-air pastries with a crisp exterior and a delicate, custardy center. They’re unfussy, surprisingly simple to make, and absolutely irresistible whether drizzled with honey, dusted with powdered sugar, or enjoyed just as they are.
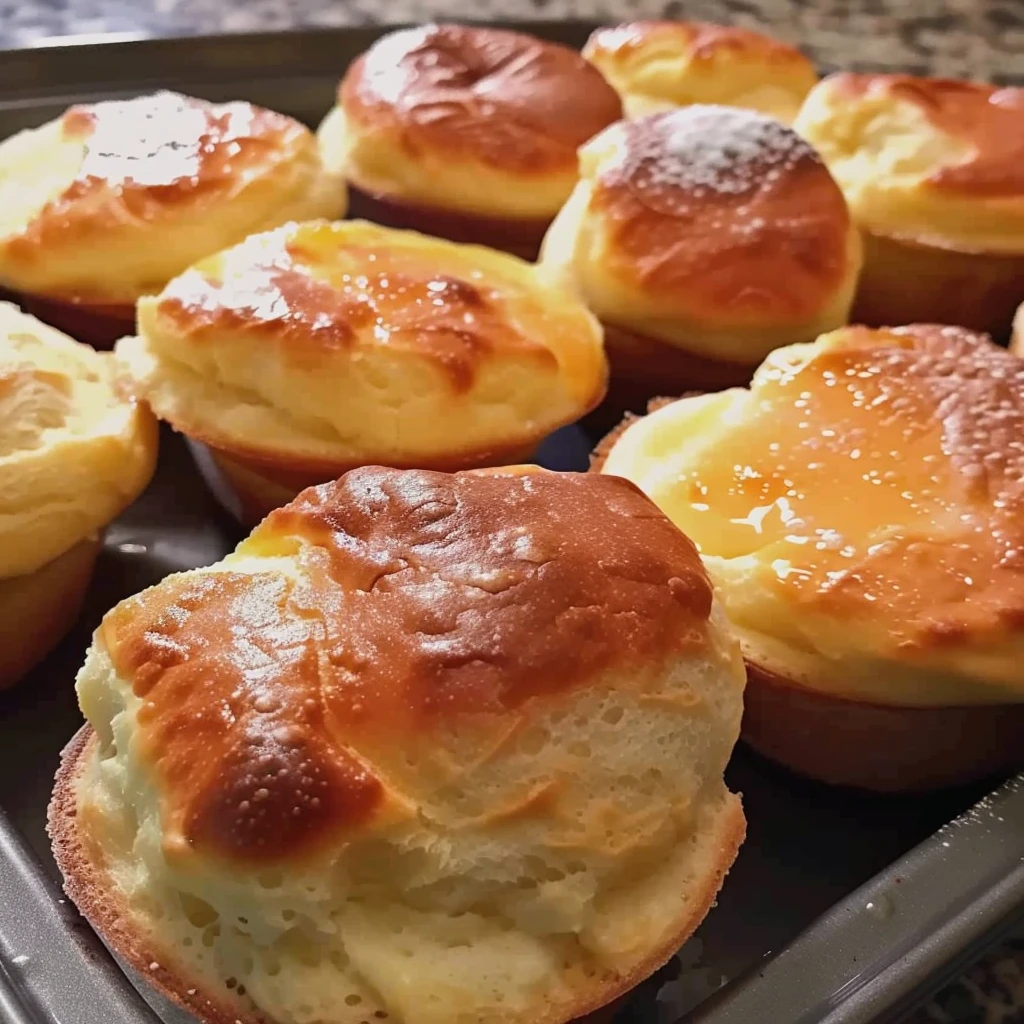
At first bite, you’ll notice the unique texture that sets the Nun’s Puffs Recipe apart from other pastries. The golden, craggy tops yield to a moist, airy crumb beneath, enhanced by just a trace of sweetness. These pastry puffs are a delight for breakfast, a whimsical addition to tea time, or an elegant dessert for any special occasion. Even if you’re not usually the baking type, fear not: with only a handful of pantry ingredients, this Nun’s Puffs Recipe guides you step-by-step to perfect results, every single time.
What gives Nun’s Puffs their characteristic charm is the choux pastry technique—think of it as the cousin to the dough used for éclairs and cream puffs. But unlike their cream-filled relatives, Nun’s Puffs bake up dimpled and hollow, making the perfect little shell for flavor. Whether you’re a dedicated home baker or just need a simple treat to satisfy your sweet tooth, keep reading to discover why you’ll fall in love with this Nun’s Puffs Recipe.
Why You’ll Love Nun’s Puffs Recipe
When it comes to charming, old-world treats, few are as magical as a batch of freshly baked Nun’s Puffs. So, what is it about this Nun’s Puffs Recipe that makes it a must-try? First, the sheer simplicity is unparalleled. With only six basic ingredients—all likely in your pantry already—this pastry offers maximum wow for minimum effort. The steps are straightforward, making the recipe accessible even for novice bakers.
Secondly, Nun’s Puffs are champions of texture and versatility. Their crisp, sugared tops provide the perfect contrast to the pillowy, egg-rich interior. Each puff tastes like a cross between a soufflé and a popover, but with an elegant French twist. Top with a drizzle of honey, or a sprinkle of cinnamon sugar, and you’ll elevate these from humble to haute cuisine.
Another reason you’ll adore this Nun’s Puffs Recipe is its speed. Unlike many yeasted doughs or laminated pastries, there’s no need for proofing or folding. You can be biting into a warm, golden puff in well under an hour. Plus, the recipe doubles or halves beautifully—ideal for brunches, parties, or cozy nights in.
In short, if you’re after a show-stopping, crowd-pleasing, and utterly delicious pastry, look no further. Let the Nun’s Puffs Recipe transport you to a Parisian café, one tender bite at a time!
Ingredients for Nun’s Puffs Recipe
To make perfect Nun’s Puffs, you only need a handful of familiar ingredients. Here’s the breakdown for the classic Nun’s Puffs Recipe:
- ½ cup (1 stick) unsalted butter: Provides richness and tender crumb.
- 1 cup milk (whole milk preferred for best texture): Lends moisture and creamy flavor.
- ¾ cup all-purpose flour: The structure for your puffs; be sure to measure accurately.
- 4 large eggs: Key for lift and custardy interior.
- ½ to 1 tablespoon granulated sugar (optional): Adds a hint of sweetness—adjust according to taste.
- Additional granulated sugar for sprinkling on top: For shimmer and caramelization.
- Honey for drizzling (optional): Adds depth and a luxurious finishing touch.
Ingredient Tips:
- Using unsalted butter allows you to control the seasoning.
- Whole milk yields the richest flavor, but low-fat versions work in a pinch.
- Fresh, large eggs are vital—the eggs do much of the leavening!
- Sugar is fully optional in the batter—traditional Nun’s Puffs aren’t overly sweet.
- Honey is classic, but you can serve these plain, with jam, or dusted with powdered sugar.
The magic of this Nun’s Puffs Recipe lies in what happens when these everyday ingredients come together. Each one plays a starring role, creating golden puffs that will wow both you and your guests.
Necessary Tools
Part of the joy of the Nun’s Puffs Recipe is how little equipment you need. There are no specialized appliances or fancy gadgets—just a few basics every kitchen likely has:
- Medium saucepan: For melting butter and scalding the milk.
- Wooden spoon or sturdy silicone spatula: For vigorous stirring of dough.
- Mixing bowl: To cool the dough before adding eggs.
- Whisk or hand mixer (optional): For beating in eggs, but strong arm power suffices!
- Standard 12-cup muffin tin: The ideal vessel for shaping and rising your puffs.
- Pastry brush (optional): For greasing the muffin tin with melted butter or oil.
- Wire cooling rack: Helps maintain crispness once puffs leave the oven.
- Measuring cups and spoons: Precision counts for best results.
- Oven mitts: Safety first!
- Ice cream scoop or two spoons: For transferring dough to the muffin cups.
That’s it! This recipe demonstrates how tradition and simplicity combine in the best baking projects. With these common kitchen tools, you’re set to master this classic Nun’s Puffs Recipe.
Ingredient Additions & Substitutions
One reason the Nun’s Puffs Recipe has endured for centuries is its adaptability. Though classic in form, it welcomes tweaks to match your taste or ingredient availability. Here are some of my favorite ways to personalize or adjust this treat:
Sugar Variations
- For an even more indulgent pastry, use up to 2 tablespoons of sugar in the batter for a sweeter result.
- Try brown sugar for a subtle caramel undertone.
Dairy Options
- Substitute whole milk with 2% if necessary; the puffs will be ever-so-slightly less tender but still tasty.
- For a dairy-free version, use unsweetened almond or oat milk, and a vegan butter alternative. Results will differ, but you’ll achieve a similar cloud-like puff.
Flour Power
- Add a spoonful of cake flour (replacing the equal measure of all-purpose) for an extra-tender crumb.
- For a gluten-free variation, a good 1:1 gluten-free baking flour blend can work, though puffs may not rise quite as dramatically.
Egg Substitutes
- Eggs are essential for traditional Nun’s Puffs, as they provide structure, lift, and flavor. However, for egg allergies, you can try aquafaba (the liquid from canned chickpeas), using three tablespoons per egg—results will not be identical, but the texture holds up relatively well.
Flavor Infusions
- Citrus zest: Add lemon or orange zest for a burst of brightness.
- Vanilla or almond extract: A dash in the batter adds subtle complexity.
- Cinnamon, nutmeg, cardamom: Blend ground spices with the sugar for a warming note.
- Drizzle with maple syrup instead of honey for a New England twist.
Toppings Galore
- Instead of plain sugar, sprinkle cinnamon-sugar, coarse turbinado sugar, or even a little sea salt on top before baking.
- Dust finished puffs with powdered sugar for a classic French look.
- Serve with a dollop of jam, lemon curd, or chocolate sauce for dessert-worthy flair.
Special Diets
- To make the Nun’s Puffs Recipe vegetarian, no changes are needed.
- For low-sugar diets, skip the sugar or use a sugar alternative like Stevia in the batter and as a sprinkle.
With these thoughtful additions and substitutions, you’ll make the Nun’s Puffs Recipe your own. It’s a canvas waiting for creative expression—so don’t hesitate to experiment and discover what you love most!
How to Make Nun’s Puffs Recipe
Making Nun’s Puffs is a blend of straightforward stovetop method and classic baking technique. The result: impressive, irresistible pastries that seem more complicated than they are! Here’s how to master the Nun’s Puffs Recipe at home:
Step 1: Prep Your Muffin Tin and Oven
Begin by preheating your oven to 375°F (190°C). It’s crucial for the puffs to go into a hot oven to maximize their rise and set their hollow interiors. Generously grease a standard 12-cup muffin tin, making sure to coat the bottoms, sides, and rims. This prevents sticking as the puffs inflate and ensures flawless release post-baking.
Step 2: Make the Dough Base
In a medium saucepan set over medium heat, melt the butter. Once fully melted, pour in the milk and stir gently. Bring the mixture to a gentle boil—watch closely, as milk can bubble over quickly! Once boiling, remove the pan from the heat and add all of the flour at once. Immediately stir vigorously with a wooden spoon or silicone spatula. The dough will look lumpy at first, but persist; it will soon come together in a smooth, cohesive ball that pulls away from the sides of the pan.
Step 3: Let the Dough Cool Slightly
Transfer the dough to a mixing bowl, or slide the pan off the burner and let it rest for about 5 minutes. This short cooling period prevents the eggs from scrambling when added, but don’t let it cool completely—the dough should stay warm.
Step 4: Add Eggs and Sweetener
Once slightly cooled, add the eggs to the dough one at a time, beating vigorously after each addition. The dough will likely separate and look odd at first—keep mixing, and it will come back together. By the time all eggs are added, the dough should be smooth, thick, and glossy, similar to stiff muffin batter. If using, add the sugar during this step and mix until fully incorporated.
Step 5: Fill the Muffin Tin
Using an ice cream scoop or two spoons, portion the dough evenly into the prepared muffin cups, filling each about two-thirds full. The dough will rise dramatically, so leaving some headspace is important. Sprinkle a pinch of granulated sugar atop each unbaked puff—this encourages a beautifully golden, glossy finish.
Step 6: Bake Until Puff and Golden
Slide the muffin tin into the preheated oven and bake for 30 minutes. Avoid opening the oven door—steam is your friend! The puffs will rise tall and develop a deeply golden, crackly top with hollow centers. When ready, they should feel light for their size.
Step 7: Cool and Serve
Promptly remove the puffs from the oven and gently transfer them to a wire rack to cool for a few minutes. This ensures the bottoms stay crisp. Serve warm, with honey drizzled over if desired, or dust with extra sugar for a final touch.
Congratulations! You’ve made beautiful, delicious Nun’s Puffs from scratch. Enjoy them fresh—they’re at their very best slightly warm from the oven.
Serving Suggestions
Nun’s Puffs are irresistibly good as is, but there are dozens of ways to enjoy these versatile treats.
- Breakfast or Brunch: Serve warm Nun’s Puffs alongside coffee or tea. The light texture is perfect for a gentle start to your day.
- Afternoon Tea: Pair with homemade jam, lemon curd, or a sprinkle of cinnamon sugar for an elegant tea-time snack.
- Dessert: Dress them up with fresh berries and whipped cream or drizzle with melted chocolate and toasted almonds.
- Party Platter: Miniaturize the puffs by filling mini muffin tins and serve as delicate finger food at your next soiree.
- Savory Twist: Omit the sugar, add grated cheese and herbs to the batter, and fill with whipped herbed cheese for a delicious appetizer.
The possibilities are endless. However you serve Nun’s Puffs, they’re guaranteed to wow your guests and bring a moment of magic to any meal.
Pro Tips & Tricks
To ensure every batch of Nun’s Puffs is as light, tall, and golden as can be, use these expert pointers:
- Room Temperature Eggs: Eggs at room temp incorporate more smoothly and help the batter emulsify.
- Vigorous Mixing: Don’t be shy! Stir swiftly when adding flour to milk and butter to create the signature choux texture.
- Don’t Over-cool the Dough: If you let the dough get cold, it won’t incorporate the eggs as well. Just 5 minutes of cooling is perfect.
- Eggs, One at a Time: Add eggs gradually and beat each in thoroughly before the next. This gives the puffs their signature rise.
- Fill Cups Properly: Two-thirds full is the sweet spot—enough space for beautiful expansion, while avoiding spillover.
- Even Oven Placement: Place your muffin tin in the center of the oven for the most consistent baking.
- Don’t Peek: Opening the oven too soon can cause the puffs to deflate.
- Serve Promptly: Nun’s Puffs lose their crisp exterior as they sit, so time your baking to serve fresh whenever possible.
- Customize the Topping: Play with sugar or spice toppings before baking to adapt the flavor profile.
With these tips, the Nun’s Puffs Recipe will become a foolproof favorite in your baking rotation.
Storage Instructions
Nun’s Puffs are best enjoyed fresh from the oven, when their shells are crisp, and the insides soft and custardy. However, if you have leftovers, here’s how to store them:
- Room Temperature: Store cooled puffs in an airtight container for up to 24 hours. They may soften slightly.
- Reheat: To restore some crispness, briefly reheat in a 350°F oven for 5-7 minutes.
- Freezing: Nun’s Puffs can be frozen, though texture may be softer on thawing. Cool completely, wrap tightly in foil, and freeze for up to one month. Thaw at room temp, then reheat in a hot oven.
- Avoid Refrigeration: The refrigerator can cause the puffs to become soggy.
Nun’s Puffs are at their magical best soon after baking, so plan to share and savor them sooner rather than later.
General Information
Nun’s Puffs are said to date back to Medieval France, where nuns in convent kitchens made airy, simple pastries with their limited staples. Their whimsical French name, “pets de nonne” (yes, literally “nun’s farts”), hints at their light, ethereal texture. Over centuries, the recipe traveled across Europe and to North America, enchanting generations with its ease and elegance.
Though similar to cream puffs, Nun’s Puffs are unique because they’re baked without filling—just pure, eggy dough that steams into a hollow center. Today, this Nun’s Puffs Recipe remains a staple at traditional bakeries and home kitchens alike, beloved for its satisfying simplicity and Old-World charm.
Whether you’re new to choux pastry or a seasoned baker, Nun’s Puffs offer a rewarding introduction to classic techniques—no pastry bag required!
FAQs
Why did my puffs collapse after baking?
This often happens if the puffs are underbaked or if the oven door is opened early. Be sure to bake until golden brown and crackly on top, and remove them promptly to a cooling rack to prevent sogginess.
Can I make Nun’s Puffs ahead?
Nun’s Puffs are best freshly baked, but you can prepare the dough a few hours ahead. Store the batter covered in the refrigerator, then bring to room temperature before baking. Baked puffs can be reheated in a hot oven to refresh their texture.
Can Nun’s Puffs be filled?
Absolutely! Traditional Nun’s Puffs are unfilled, but you can slice open cooled puffs and stuff them with whipped cream, custard, jam, or chocolate for a delightful variation.
Are Nun’s Puffs gluten-free?
The classic recipe is not gluten-free, but you can substitute a 1:1 gluten-free flour blend. Note that the rise and texture will change, but you’ll still get a tasty treat.
Can I reduce the sugar or make this unsweetened?
Of course! The sugar in Nun’s Puffs is minimal and optional. For a savory version, skip the sugar and enjoy with herbs or cheese.
Why are they called Nun’s Puffs?
Legend has it nuns first made these pastries in convent kitchens centuries ago. The whimsical name likely refers to their light, almost “airy” quality—making them a holy delight!
Conclusion
The Nun’s Puffs Recipe is a delightful fusion of tradition, simplicity, and pure baking pleasure. With just a handful of pantry staples and a touch of technique, you can create golden pastries that capture the wonder of French baking right at home. Whether you’re baking for family, enjoying a quiet morning, or entertaining friends, Nun’s Puffs add charm and elegance to every table.
So don your apron, preheat your oven, and let the aroma of buttery, eggy puffs fill your kitchen. This recipe isn’t just about dessert—it’s about creating moments of joy, one delicate pastry at a time. Try the Nun’s Puffs Recipe once, and it just might become a cherished favorite.
Nutritional Information
Curious about what goes into each delicious puff? Here’s a rough breakdown of nutritional facts for a single Nun’s Puff (when dividing the recipe into 12 pastries, without honey drizzle):
- Calories: Approximately 110-130 kcal
- Fat: 7g (mostly from butter and eggs)
- Carbs: 10g (including minimal added sugar)
- Protein: 3g (from eggs)
- Sugar: 1-2g (depending on how much is used in the dough and topping)
- Cholesterol: Approximately 75-85mg
These airy pastries, though not health food, offer a lighter treat compared to heavier yeasted or laminated pastries. For a lighter version, reduce the butter or sugar, but enjoy them in moderation as part of a balanced approach to sweet indulgence!
Print
Nun’s Puffs Recipe: Classic French Choux Pastries
- Total Time: 45 minutes
- Yield: 12
Description
Nun’s Puffs are a classic French choux pastry, known for their golden, airy texture and subtle sweetness. Prepared with pantry staples including butter, milk, flour, and eggs, the dough is mixed, piped into muffin tins, and baked until tall and craggy. Optionally sprinkled with sugar and finished with honey, Nun’s Puffs make a delightful breakfast, snack, or elegant dessert. Their crisp exterior and tender interiors are achieved through a unique cooking method, balancing both richness and lightness in every bite.
Ingredients
- 1/2 cup (1 stick) unsalted butter
- 1 cup milk
- 3/4 cup all-purpose flour
- 4 large eggs
- 1/2 to 1 tablespoon granulated sugar (optional, for added sweetness)
- Additional granulated sugar for sprinkling on top
- Honey for drizzling (optional)
Instructions
- Preheat oven to 375°F (190°C). Generously grease a 12-cup muffin tin, coating bottoms, sides, and rims.
- In a medium saucepan over medium heat, melt butter. Add milk and bring to a gentle boil.
- Add flour all at once, stirring vigorously until mixture forms a cohesive ball. Remove from heat and let cool for 5 minutes.
- Beat in eggs one at a time, mixing well after each addition. Dough will become smooth and thick, resembling stiff muffin batter.
- Divide dough evenly among muffin cups, filling each about two-thirds full. Sprinkle each with a pinch of sugar.
- Bake 30 minutes or until puffs are tall, golden brown, and craggy.
- Immediately transfer puffs from tin to wire rack to cool slightly. Serve warm, drizzling with honey if desired.
Notes
Substitute whole milk with non-dairy milk if needed; use margarine instead of butter for a dairy-free version. For make-ahead, bake and cool completely, then store in an airtight container at room temperature for up to 2 days or freeze for up to 1 month. To refresh, reheat in a 350°F oven for 5-7 minutes. Common issues like flat puffs are often due to under-beating eggs or opening the oven door early. Ensure thorough mixing for best rise, and remove promptly from tins to prevent sogginess.
- Prep Time: 15 minutes
- Cook Time: 30 minutes
- Category: Dessert
- Method: Baking
- Cuisine: French