
My Grandmother’s Pie Crust Recipe: The Secret to Flaky Perfection
When I think of comfort and nostalgia in the kitchen, my thoughts always drift back to my grandmother’s pie crust recipe. This is not just any pie crust—it’s the very foundation of family gatherings, celebrations, and those quiet moments with a slice of something sweet (or savory!) and a mug of tea. The flakiness, the golden hue, and the irresistible aroma that fills the air—it all comes down to a few simple ingredients and, most importantly, a handful of passed-down wisdom. My grandmother’s pie crust recipe features one remarkable secret: a pinch of cream of tartar. According to her, this not-so-common addition transforms a humble dough into pastry gold. Today, I’m thrilled to share this treasured recipe and tips for achieving her legendary results, step by loving step.
Why You’ll Love My Grandmother’s Pie Crust Recipe
- Incredibly flaky layers that shatter delicately with every bite
- Time-tested family recipe with a unique twist (hello, cream of tartar!)
- Versatile enough for both sweet and savory pies
- Made entirely by hand for satisfying old-fashioned results
- Simple ingredients you likely already have in your pantry
- The comforting nostalgia of baking from scratch
- Easy-to-follow for both novice and experienced bakers
Ingredients for My Grandmother’s Pie Crust Recipe
The beauty of my grandmother’s pie crust recipe is its simplicity. Everything you need is likely already tucked away in your pantry or fridge. Here’s a breakdown of each ingredient, so you understand their role in achieving that perfect crust:
- 3 cups all-purpose flour
- Choose a high-quality, unbleached flour for the best flavor and texture. Always sift to eliminate lumps and aerate.
- 1/4 teaspoon cream of tartar
- The secret ingredient: adds subtle tang and helps tenderize the dough, leading to a flakier texture.
- 1 teaspoon salt
- Essential for bringing out the flavors, balancing the richness of the Crisco and egg.
- 1 1/2 cups Crisco vegetable shortening
- The classic fat for pie crusts—creates exceptionally flaky layers. Be sure it’s well chilled for best results.
- 4 to 8 tablespoons very cold water
- Water temperature is integral! Start with less and add as needed to bring the dough together—always ice-cold.
- 1 well-beaten egg
- Contributes richness, color, and extra tenderness to the finished crust.
- 1 tablespoon vinegar
- Helps inhibit gluten formation for extra tenderness, plus a touch of flavor complexity.
Remember: According to my grandmother, the magic of this recipe is keeping everything cold—including the flour! Working by hand preserves the delicate crumb and ensures a pie crust worthy of any family gathering.
Necessary Tools
Before embarking on my grandmother’s pie crust recipe, gather your essential tools. Good equipment ensures a smooth, enjoyable process and the most consistent, delicious results:
- Large mixing bowl
- Roomy enough to blend ingredients without spilling flour.
- Pastry cutter or two forks
- Essential for cutting the cold Crisco into the flour, creating pea-sized pieces for ultimate flakiness.
- Measuring cups and spoons
- Precision matters—measure your ingredients accurately for the perfect dough.
- Whisk or fork
- For beating the egg and incorporating it smoothly with the water and vinegar.
- Rolling pin
- A sturdy, well-floured pin helps achieve even, thin dough for all your pies.
- Bench scraper
- Wonderful for gathering dough and cleaning your work surface with ease.
- Plastic wrap or parchment paper
- For wrapping and chilling the dough before rolling it out.
- Pie pan(s)
- Choose a classic metal or glass pan for the most reliable baking.
- Optional: Food scale
- If you like next-level precision, weighing your flour or fat can offer ultimate consistency.
Keep some extra flour for dusting your countertop and rolling pin. And, most importantly, have patience and a dash of love—my grandmother swore these were just as important as her recipe!
Ingredient Additions & Substitutions
One of the many reasons my grandmother’s pie crust recipe is timeless is its flexibility. Whether dietary restrictions, availability, or curiosity inspire your changes, here’s how you can tailor it while preserving its signature charm:
- Flour Alternatives:
- If you need a gluten-free option, use a high-quality 1:1 gluten-free all-purpose flour blend. Note that texture may vary, but the process remains the same.
- For extra flavor, swap in up to 1/2 cup of whole wheat flour. The crust will be heartier and more rustic.
- Fat Substitutions:
- Instead of Crisco, you can use all-butter for a slightly richer, more decadent crust. Make sure your butter is ice-cold and cut into small cubes.
- For a balance of flavor and flake, try a mix of half butter, half shortening.
- If you prefer a plant-based crust, choose a vegan shortening and use a flaxseed “egg” (1 tbsp flaxseed meal + 2.5 tbsp water, rested) instead of the egg.
- Liquid Requirements:
- Water must always be ice-cold. If adding a bit more for dry climates, do it one tablespoon at a time.
- Apple cider vinegar can be used in place of white vinegar for a slightly fruity undertone.
- Cream of Tartar:
- If you don’t have cream of tartar, a small squeeze of lemon juice can serve in a pinch, though it’s not quite the same. This is the “secret” ingredient, so try not to skip it!
- Add-in Flavors and Herbs:
- For savory pies, consider adding finely chopped fresh herbs (thyme, rosemary) directly to the flour mixture.
- For a sweet twist, a pinch of cinnamon or cardamom can complement fruit fillings beautifully.
- Salt Adjustments:
- Reduce salt by half if using salted butter, or adjust as needed for low-sodium diets.
Above all, remember that the secret to this recipe’s success is keeping everything as cold as possible and letting your hands do the mixing. Adapt, experiment, and make it your own—just as generations before us have done.
How to Make My Grandmother’s Pie Crust Recipe
There’s a special rhythm to making my grandmother’s pie crust recipe. Each step, from measuring to rolling, is a quiet ritual—a connection to simpler times and generations of bakers. Her favorite tip? Don’t rush, and always trust your fingertips. Here’s how to go from simple pantry staples to a golden, flaky crust that’s pure magic.
Step 1: Prepare Your Ingredients
Gather all your ingredients and tools. Place the Crisco, flour, salt, and cream of tartar in the refrigerator for at least 30 minutes before starting. Chilling your mixing bowl and rolling pin can also help, especially in warm kitchens.
Step 2: Combine Dry Ingredients
In your chilled mixing bowl, whisk together the flour, cream of tartar, and salt. This ensures even distribution and makes the next steps easier.
Step 3: Cut In the Fat
Add the cold Crisco to your flour mixture. Using a pastry cutter or two forks, work the Crisco in until the mixture resembles coarse crumbs with pea-sized bits. This creates the pockets that bake up into flakiness.
Step 4: Mix Wet Ingredients
In a separate small bowl or measuring cup, beat the egg. Add the vinegar and 4 tablespoons of ice-cold water. Whisk until well combined.
Step 5: Bring Dough Together
Slowly drizzle the egg mixture over your flour mixture. Gently stir with a fork or your hands until the dough just holds together. If it feels dry, add more cold water, a tablespoon at a time—avoid overworking.
Step 6: Divide and Chill
Turn the dough out onto a lightly floured surface. Gather it into a ball, then divide into two equal portions for a double crust pie or keep whole for other uses. Flatten each portion into a disk, wrap tightly in plastic wrap, and refrigerate for at least an hour (up to overnight).
Step 7: Roll and Shape
On a floured surface, roll out your dough to about 1/8-inch thickness. Gently lift into your pie pan, trim, and shape the edges as desired. Fill according to your pie recipe, then top with the second sheet if making a double crust.
Step 8: Bake and Enjoy
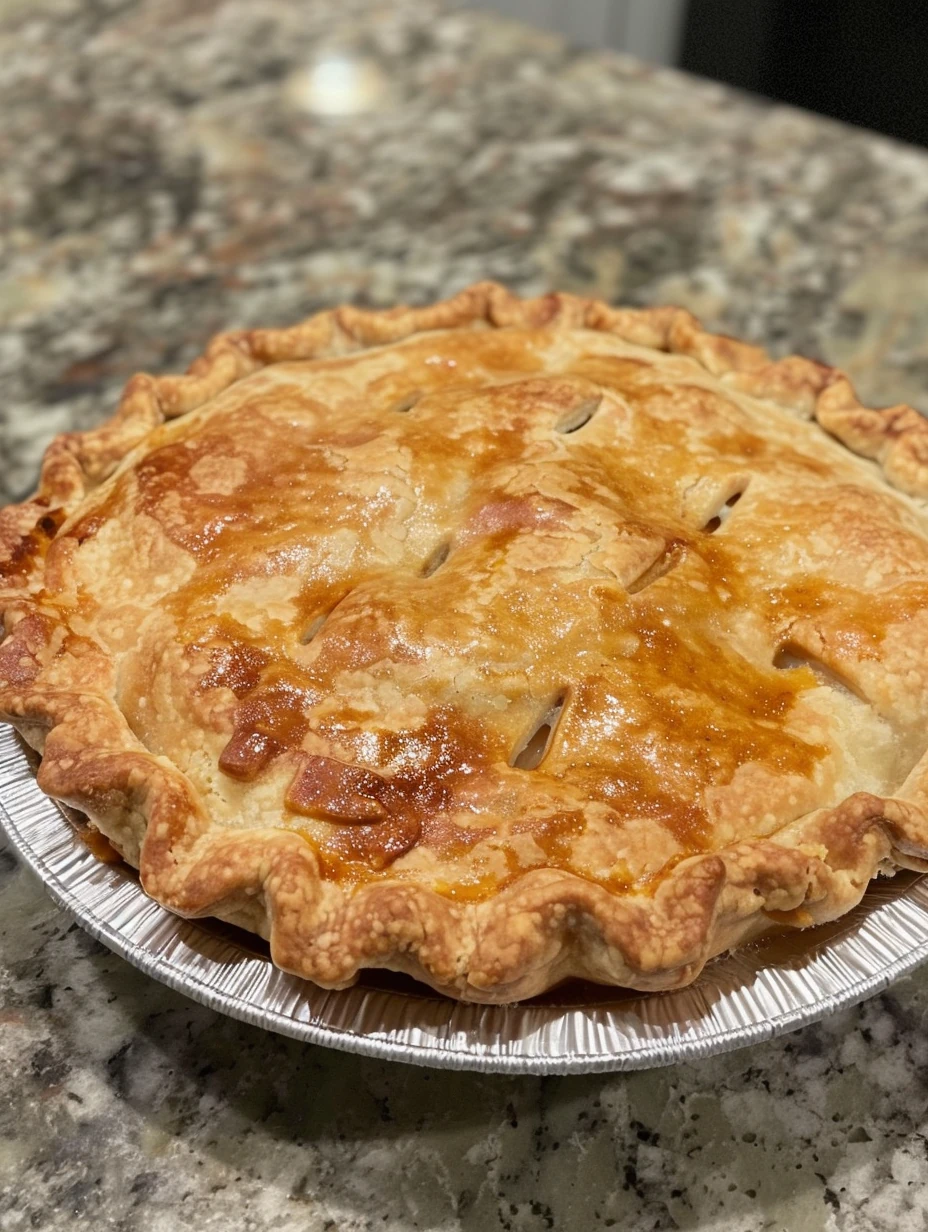
Brush with an egg wash for extra color, cut a few slits for steam, and bake according to your pie’s filling directions. Admire your pie—the true taste of tradition!
Serving Suggestions
One of the joys of my grandmother’s pie crust recipe is its incredible versatility at the table. This crust pairs beautifully with just about any filling—savory or sweet—making it the go-to pastry for holidays, special occasions, or any afternoon that calls for pie. For classic comfort, try it with apple, peach, or cherry fillings. For a savory twist, this crust is delicious beneath quiches or atop chicken pot pie. Serve fresh from the oven with a scoop of vanilla ice cream, a dollop of whipped cream, or simply on its own so the crust’s buttery flavor can shine.
For gatherings, cut petite slabs and serve on a wooden board alongside fruit preserves and cheeses. If making hand pies, tuck them into lunchboxes or picnic baskets. There’s no wrong way to serve a pie this good!
Pro Tips & Tricks
If you’re aiming for crust nirvana, these professional (and grandmother-approved) tips make all the difference with my grandmother’s pie crust recipe:
- Always use very cold ingredients right down to your flour and bowl—warmth is the enemy of flakiness.
- Avoid overmixing—work the dough only until it holds together. Overmixing leads to tough crust.
- Rest your dough in the fridge before rolling; this relaxes gluten and keeps the crust tender.
- Roll gently and evenly, always starting from the center and rotating your dough to maintain a circular shape.
- To transfer rolled dough, roll it loosely over your pin and unroll it onto the pie dish for minimal tearing.
- A little extra flour on your hands and pin prevents sticking without toughening the dough.
- Egg wash your top crust for shine and deeper color: 1 egg yolk plus 1 tablespoon milk or water, whisked and brushed over before baking.
- Don’t forget to vent your top crust—small slits allow steam to escape for a crisp finish.
- Bake on a lower oven rack to promote a perfectly golden, crisp bottom crust.
Grandma’s last tip? Don’t be afraid of imperfection—rustic edges and little cracks just mean this pie is made by hand, with love.
Storage Instructions
Preserving the freshness and flakiness of my grandmother’s pie crust recipe is simple with a few easy steps:
- Chilled, Unbaked Dough: Disks of dough can be wrapped tightly in plastic wrap and kept in the refrigerator for up to 3 days. For longer storage, tuck into a freezer bag and freeze for up to 3 months. Thaw overnight in the fridge before use.
- Pre-Baked Pie: Leftover baked pie (with filling) keeps well covered at room temperature for up to 2 days or refrigerated for up to 5 days.
- Baked, Empty Shell: A fully baked, unfilled crust can be wrapped and frozen up to a month. Recrisp in a 375°F oven for a few minutes before filling.
Store individual slices, covered, in airtight containers to prevent the crust from drying out. Always allow pies to cool to room temperature before storing to avoid sogginess.
General Information
My grandmother’s pie crust recipe is a traditional American-style pastry, rooted in generations of home baking. Unlike French pâte brisée or puff pastry, this crust is rich, sturdy, and dependable, perfect for everything from apple and pumpkin pies to hearty meat or vegetable pot pies. The use of cream of tartar as a “secret ingredient” is unique and imparts both tenderness and a subtle, bright flavor note that sets this recipe apart.
This crust can be rolled thin or left a bit thicker, depending on your filling and preference. It browns beautifully, with a classic crimped edge that brings instant nostalgia to the dessert table. Experimenting with decorative cut-outs or latticework is encouraged—the dough is sturdy enough to hold any shape.
FAQs
Can this recipe be doubled or halved easily?
Absolutely! My grandmother’s pie crust recipe easily adapts to suit your pie-baking needs. Halve it for just one crust or double for a pie marathon—just be sure to chill each portion thoroughly.
Is it possible to make this crust gluten-free?
Yes—the key is using a cup-for-cup gluten-free flour blend. The crust texture may vary slightly, but with the tips for keeping everything cold and working by hand, you’ll achieve admirable results.
Can I freeze the dough for later use?
Definitely. Wrap portions tightly and freeze for up to three months. Thaw in the fridge overnight before rolling.
What’s the best fat to use if I don’t have Crisco?
Cold unsalted butter works beautifully, creating even richer flavor. Or use a combination of butter and shortening for the ideal blend of flavor and flakiness.
Is this pie crust suitable for both sweet and savory recipes?
Yes! The balance of salt and subtle acidity from vinegar and cream of tartar makes it the perfect neutral base for both types of pies.
Why is my dough cracking or too dry?
Usually, this means not enough cold water was used. Add more water, a tablespoon at a time, until the dough just holds together.
Do I have to chill the dough before rolling it out?
Absolutely—chilling is essential. It relaxes the gluten, keeps the dough easy to work with, and ensures crisp, flaky layers when baked.
Conclusion
There’s nothing quite like the aroma of a pie baking from scratch—especially when that pie begins with my grandmother’s pie crust recipe. This treasured family method ensures a flaky, tender crust every single time, whether you’re making a holiday classic or a weeknight tart. Keep her secret ingredient in your pantry, bake with love, and you’ll soon be known for your own legendary pies. From my family to yours, may every slice carry a little warmth, tradition, and joy.
Nutritional Information
Each serving of my grandmother’s pie crust recipe (based on one-eighth of a double-crust pie) contains approximately:
- Calories: 330
- Fat: 22g (Saturated fat: 6g)
- Carbohydrates: 29g
- Protein: 4g
- Sodium: 225mg
- Cholesterol: 30mg
- Fiber: 1g
- Sugar: Less than 1g
These values will depend on the exact filling and any variations you choose. For lighter options, replace some of the Crisco with unsweetened applesauce (not recommended for pies that need a super flaky crust) or use a smaller pie pan for more, smaller servings. As always, pie is meant to be enjoyed—savor every bite and every memory it brings back. Happy baking!
PrintPie Crust Recipe with Cream of Tartar – My Grandmother’s Secret
- Total Time: 20 minutes
- Yield: 2 double-crust pies or 4 single-crust pies
Description
Pie Crust Recipe with Cream of Tartar delivers a flaky, tender crust crafted from simple pantry staples and a distinctive touch of cream of tartar. Using cold ingredients and Crisco shortening ensures incredible texture while a blend of egg, vinegar, and ice water binds the dough together. Prepared entirely by hand, this classic homemade crust is perfect for sweet or savory pies.
Ingredients
- 3 cups flour
- 1/4 teaspoon cream of tartar
- 1 teaspoon salt
- 1 1/2 cups Crisco shortening
- 4 to 8 tablespoons very cold water
- 1 large egg, well beaten
- 1 tablespoon vinegar
Instructions
- Chill all ingredients, including flour, bowl, and utensils, to ensure everything stays cold.
- In a large mixing bowl, whisk together flour, cream of tartar, and salt.
- Add Crisco shortening to the flour mixture. Using clean cold hands or a pastry cutter, cut in the shortening until the mixture resembles coarse crumbs.
- In a separate small bowl, mix very cold water (start with 4 tablespoons), the beaten egg, and vinegar together.
- Gradually incorporate the wet mixture into the flour mixture with your hands, adding more cold water as needed, just until dough comes together but is not sticky.
- Divide dough as needed, shape into discs, wrap in plastic, and chill for at least 30 minutes before rolling out.
- Roll out chilled dough on a lightly floured surface as needed for your pie recipe.
Notes
Butter can replace some or all of the Crisco for a richer flavor, though texture may differ. Substitute white vinegar with apple cider vinegar if preferred. Make the dough ahead and store wrapped in plastic wrap in the fridge for up to 3 days or freeze for up to 3 months. If the dough is crumbly, add water a teaspoon at a time. If sticky, sprinkle with flour. Overworking the dough can make it tough; minimize handling.
- Prep Time: 20 minutes
- Cook Time: 0 minutes
- Category: Pastry
- Method: Hand Mixing
- Cuisine: American