
4 Ultimate Reasons to Adore Mason Jar Vanilla Bean Ice Cream
Indulge in pure delight with this crowd-pleasing Mason Jar Vanilla Bean Ice Cream! Crafted for instant happiness and a touch of cozy nostalgia, this dessert brings irresistible creaminess with every spoonful. Whether you’re treating yourself on a sunny afternoon or captivating your guests with a homemade masterpiece, this easy recipe guarantees a truly joyous ice cream adventure. If you love flavor-packed no-bake treats, you’ll want to check out our No-Bake Mini Banana Cream Pies for more inspiration!
Why You’ll Love Mason Jar Vanilla Bean Ice Cream
- Bursting with luxurious vanilla flavor and soul-soothing creaminess
- Surprisingly simple—requires just a handful of dreamy ingredients
- Mason jars offer a fun, mess-free way to create and serve
- Wholesome, fresh, and made without complicated equipment—pure joy in every bite
Ingredients for Mason Jar Vanilla Bean Ice Cream
Homemade ice cream never tasted so comforting and enchanting! For this unforgettable vanilla experience, every single ingredient provides a burst of satisfaction. Here’s everything you’ll need:
- 1 cup heavy cream – brings luscious texture and melt-in-your-mouth richness
- 1/2 cup whole milk – balances creaminess with a silky, irresistible finish
- 1/3 cup granulated sugar – heightens sweetness, coaxing out joyful flavors
- 1 vanilla bean, split and scraped – infuses an extraordinary, aromatic warmth; those specks signal authentic happiness!
- 3 large egg yolks – thicken for an ultra-smooth, decadent feel
- Pinch of salt – magnifies each note for elevated taste
- 4 wide-mouth mason jars (16 oz size) – the heart of this whimsical treat
- Ice – essential for fast, magical chilling
- 1/2 cup coarse salt – amplifies cooling for a sumptuously soft churn
When you select each ingredient, envision aromatic vanilla swirling and the fresh dairy mingling with golden egg yolks—an experience that’s not just easy, but positively irresistible. If you’re a fan of vanilla delights, don’t miss our Vanilla Pumpkin Marshmallow Coffee Syrup for another comforting treat!
Necessary Tools
Transform your kitchen into a joyful ice cream parlor with a few powerful essentials:
- 4 sturdy, wide-mouth mason jars (16 oz) – anchor your rich, frozen dessert and make serving a breeze
- Heavy-bottomed saucepan – ensures effortless, even heating for your creamy base
- Whisk – easily blends sugar and yolks for smooth perfection
- Fine mesh strainer – removes any pesky solids, leaving only silky satisfaction
- Large mixing bowl – gives you space to combine and cool
- Measuring cups and spoons – guarantee stunningly accurate proportions
- Reliable thermometer – checks the temperature so your custard is blissfully thick, never curdled
- Big container or bowl for the ice/salt bath – speeds up the freezing for astonishingly creamy results
These vivid tools work together and make creating homemade Mason Jar Vanilla Bean Ice Cream utterly delightful. Their quality shines as you handcraft each batch with flair and confidence.
Ingredient Additions & Substitutions
Ready to ignite your creativity? Transform your ice cream into a mouthwatering sensation with these captivating twists:
- Chocolate Lovers: Swirl in mini chocolate chips, dark chocolate chunks, or even shaved white chocolate for a double-layered treat. Each bit adds playful bursts of flavor, reminiscent of our No-Bake Mini Banana Cream Pies that offer creamy indulgence with a surprising crunch.
- Nutty Delight: Sprinkle toasted almonds, pecans, or pistachios between layers for blissful texture and a sense of abundance.
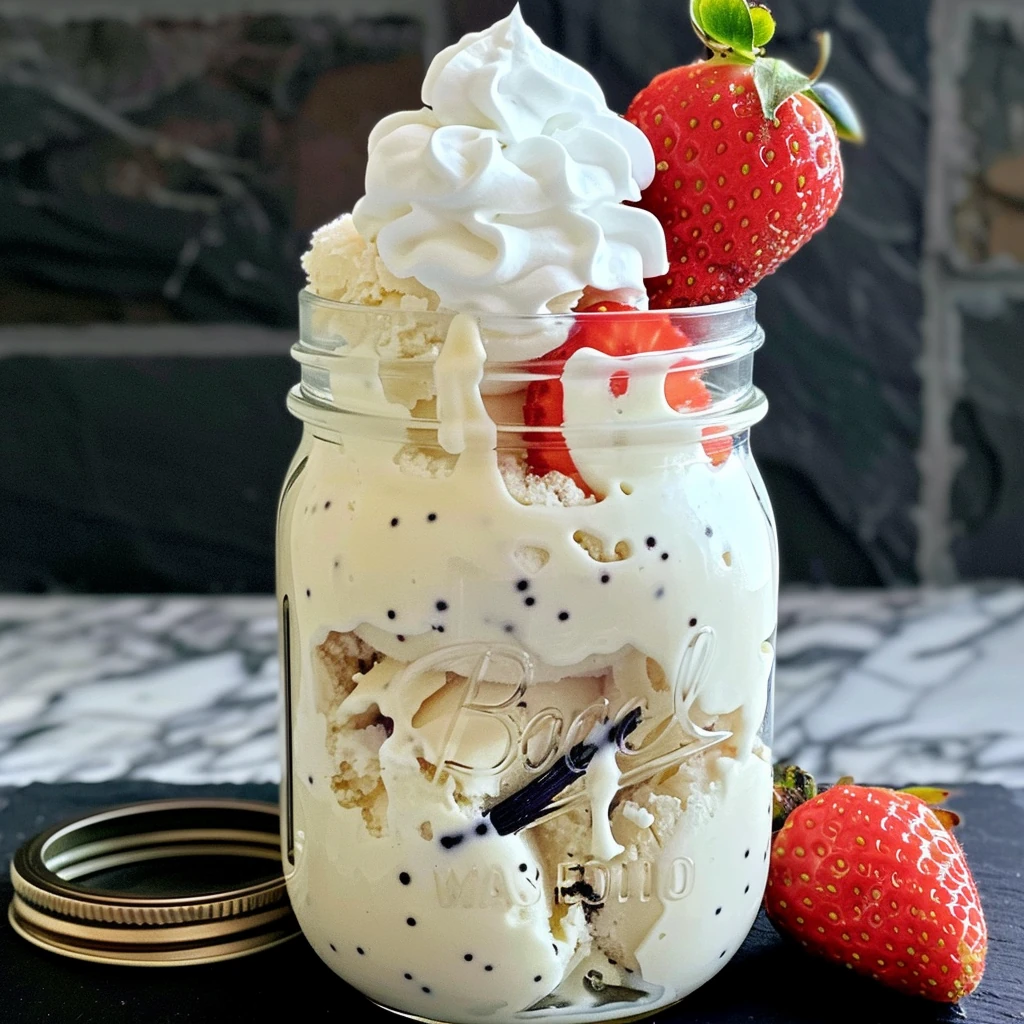
- Dreamy Fruits: Gently fold in fresh raspberries, strawberries (like those tantalizingly perched on top in our image), or blueberries for bright pops of color and lip-smacking vibrance.
- Salted Caramel Magic: Ripple in homemade caramel sauce, elevating each scoop with dazzling, satisfying sweetness.
- Dairy-Free: Substitute with coconut cream and almond milk—while the texture changes, the delightful aroma persists. For more coconut-infused ideas, get inspired by the Mason Jar Zucchini Noodle Salad with Coconut-Lime-Avocado Dressing.
- Sugar Substitutes: Opt for honey, agave, or a fine natural sweetener to keep things radiant yet guilt-free.
- Egg-Free: Try adding a spoonful of cornstarch to create thickness without yolks. It maintains that silky gloss while staying lighter.
Don’t hesitate to play with flavors—just like in our Spiralized Lemon-Basil Zucchini Mason Jar Salads, where customization means every bite can be a new adventure. With Mason Jar Vanilla Bean Ice Cream, each change brings a fresh source of delight, making it your personal, showstopping dessert!
How to Make Mason Jar Vanilla Bean Ice Cream
Creating your own Mason Jar Vanilla Bean Ice Cream is an act of pure celebration! The process is inviting and incredibly rewarding—every shake and swirl amplifies the anticipation for a creamy treat. Below, you’ll discover each vivid step to artisan-quality ice cream in your own kitchen.
Step 1: Infuse and Warm the Milk & Cream
Pour heavy cream, whole milk, and the split vanilla bean pod into a saucepan. Warm over medium-low heat until steaming and aromatic. This aromatic process draws out fragrant vanilla specks, surrounding your kitchen with inviting comfort.
Step 2: Whisk Egg Yolks, Sugar, and Vanilla Beans
In a large mixing bowl, vigorously whisk together the golden egg yolks, granulated sugar, vanilla seeds (scraped from the pod), and a pinch of salt. Achieve a pale, lush consistency—a promise of irresistible smoothness in every spoonful.
Step 3: Temper and Combine
Slowly, with passion, drizzle the hot cream mixture into the yolk blend, whisking constantly. This careful uniting prevents scrambling and allows the flavors to meld with confidence.
Step 4: Cook the Custard to Silky Perfection
Return the combined mixture to the saucepan. Stir gently over low heat until it thickens to coat the back of a spoon and reaches 170°F. This step unlocks a rich, spoonable custard teeming with genuine vanilla allure.
Step 5: Strain and Chill the Custard
Pour the cooked custard through a fine mesh strainer into a fresh bowl, removing any cooked yolk for ultra-smoothness. Let it cool completely—your patience will be rewarded with dreamy texture.
Step 6: Fill Mason Jars With Creamy Base
Once cool, pour the base into your mason jars, filling each about one-third full. This acts as the foundation of your unique, hand-shaken ice cream.
Step 7: Create the Ice Bath
Arrange the jars in a larger bowl, surrounding them with a dynamic blend of ice and coarse salt. This magical combo chills your ice cream rapidly, ensuring mighty creaminess.
Step 8: Shake for Creamy Magic
Seal the jars tightly. Now comes the playful part—shake each vigorously for 15 to 20 minutes. Your adventurous energy gets rewarded as the mixture thickens.
Step 9: Rest, Then Shake Again
Let the jars rest for 5 minutes, absorbing the chill. Then give them another brisk shake until the mixture achieves unmistakable richness.
How to Serve Mason Jar Vanilla Bean Ice Cream
Unlock pure joy with your ice cream’s presentation! Mason jars not only make for inspired storage but serve as adorable, rustic vessels for dessert magic. Top each jar with a swirl of whipped cream, scatter jewel-toned fresh berries across the creamy peaks, and tuck in a sprig of vibrant mint for a splash of color. Serve alongside fun dessert spoons for a whimsical, social treat. Everything about this presentation says “celebration,” bringing both beauty and big smiles to every table.
Pro Tips & Tricks
- Always use real vanilla beans for powerful, aromatic flavor—never settle for less.
- Chill your custard base overnight to deepen the notes and create even silkier cream.
- For extra excitement, layer ingredients (like caramel, cookie chunks, or fruit) right in the jar before shaking.
- Shake the jars with bold rhythm—this is key for a perfectly whipped texture.
- Store metal lids in the freezer before sealing the jars to enhance quick chilling.
- Push your creativity—this versatile dessert is a canvas for your wildest flavor dreams!
- Offer a fun ice cream “bar” with toppings, just like the festive experience provided by our No-Bake Mini Banana Cream Pies.
Storage Instructions
Keep your freshly churned Mason Jar Vanilla Bean Ice Cream covered tightly in the freezer. With airtight lids on your mason jars, your creation stays delicious for up to one week. For best flavor and texture, let the jar sit out for 5 to 10 minutes before scooping, so each bite is as creamy and satisfying as possible. Returning leftovers directly to the fridge is not recommended—freezer storage keeps everything luscious and prevents melting.
General Information
Homemade Mason Jar Vanilla Bean Ice Cream offers a joyful way to bring personalized ice cream into your kitchen, no fancy machines needed. This crowd-thrilling method lets you easily adjust ingredients for dietary preferences or inspired flavor twists. Serving directly from the jar means zero fuss and endless creative options—individual servings are perfect for picnics, dinners, or spontaneous celebrations. It’s wholesome fun for all seasons!
FAQs
Can I use vanilla extract instead of a vanilla bean for this recipe?
Absolutely! While vanilla beans bring heightened aroma and soulful depth, quality vanilla extract still delivers charming flavor. Use one and a half teaspoons for genuine, sweet notes.
How do I know when the custard is cooked enough?
The custard is perfectly cooked when it cloaks the back of a spoon and a finger dragged across leaves a clean line. A thermometer reading of 170°F gives total confidence.
Are there quick add-ins for more flavor?
Definitely! Crushed cookies, chocolate chips, berry preserves, or swirls of nut butter make every batch radiant with new textures and tastes.
What’s the secret to the smoothest ice cream texture?
Thorough whisking, proper straining, and mindful temperature control yield optimally creamy results—so don’t skip these details!
Can kids help with shaking the jars?
Absolutely—kids love this energetic step! Just be sure jars are tightly sealed and protected from accidental drops.
What to Serve With Mason Jar Vanilla Bean Ice Cream
Let your Mason Jar Vanilla Bean Ice Cream star on a dreamy dessert board! Surround it with fudgy brownies, delicate lemon bars, or buttery cookies for a triumphant finish. It pairs beautifully with fresh berry compotes or drips of warm caramel. For more vanilla-infused happiness, treat yourself to our Vanilla Pumpkin Marshmallow Coffee Syrup—drizzle on top or stir into your evening coffee for decadent completeness! This ice cream also sits irresistibly alongside seasonal fruit pies or even a slice of zesty cake.
Conclusion
Mason Jar Vanilla Bean Ice Cream embodies everything we cherish in homemade desserts—love, creativity, and the thrill of making something truly special, right at home. Every spoonful is pure comfort, offering endless ways to adapt and personalize to your preferences. Let this joyful treat bring abundant smiles and sweet memories to your table, one creamy jar at a time!
Nutritional Information
Packed with real dairy and the goodness of egg yolks, each serving delivers a rich, satisfying texture, perfect for occasional indulgence. Mason Jar Vanilla Bean Ice Cream offers a mindful treat, with simple, wholesome ingredients and the flexibility to adjust for your lifestyle.
PrintVanilla Bean Mason Jar Ice Cream
- Total Time: 1 hour 15 minutes
- Yield: 4
Description
Vanilla Bean Mason Jar Ice Cream is a delightful, homemade treat featuring the classic flavors of rich cream, fresh vanilla bean, and a smooth custard base. Prepared conveniently in mason jars, it is a simple no-churn method perfect for those wanting fresh ice cream without an ice cream maker. The process involves infusing cream and milk with vanilla, tempering egg yolks for a creamy texture, and thoroughly shaking the jars on ice for a smooth, scoopable ice cream that’s perfect for any occasion.
Ingredients
- 1 cup heavy cream
- 1/2 cup whole milk
- 1/3 cup granulated sugar
- 1 vanilla bean, split and scraped
- 3 large egg yolks
- Pinch of salt
- 4 wide-mouth mason jars (16 oz)
- Ice
- 1/2 cup coarse salt
Instructions
- Heat the heavy cream, whole milk, and vanilla bean pod in a saucepan until steaming.
- In a bowl, whisk together egg yolks, granulated sugar, vanilla seeds, and salt until the mixture is pale.
- Slowly pour the hot cream mixture into the yolk mixture, whisking constantly to temper the eggs.
- Return the mixture to the saucepan and cook over low heat, stirring constantly, until it thickens enough to coat the back of a spoon and reaches 170°F.
- Strain the custard mixture through a fine mesh sieve and let cool completely.
- Divide the cooled ice cream base evenly among the mason jars, filling each jar one-third full.
- Seal the jars tightly with lids.
- Place the jars in a larger container, surrounding them well with ice and coarse salt.
- Shake each jar vigorously for 15 to 20 minutes to aerate and thicken the ice cream base.
- Let the jars sit for 5 minutes, then shake again until the mixture is thick and creamy.
Notes
For a dairy-free version, substitute coconut cream and almond milk for the heavy cream and whole milk. Use vanilla extract if vanilla beans are unavailable (1 tablespoon). Make ahead: Prepare the custard up to two days in advance and chill in the fridge before shaking. Store finished ice cream in the jars for up to 1 week in the freezer. If ice cream is too hard, let it sit at room temperature for 5-10 minutes to soften. Ensure jars are sealed tightly to prevent freezer burn and leaks while shaking. If not thickening, shake longer, and consider using smaller jars for quicker results.
- Prep Time: 30 minutes
- Cook Time: 45 minutes (Chill/Shake time)
- Category: Dessert
- Method: No-Churn/Shaking
- Cuisine: American