
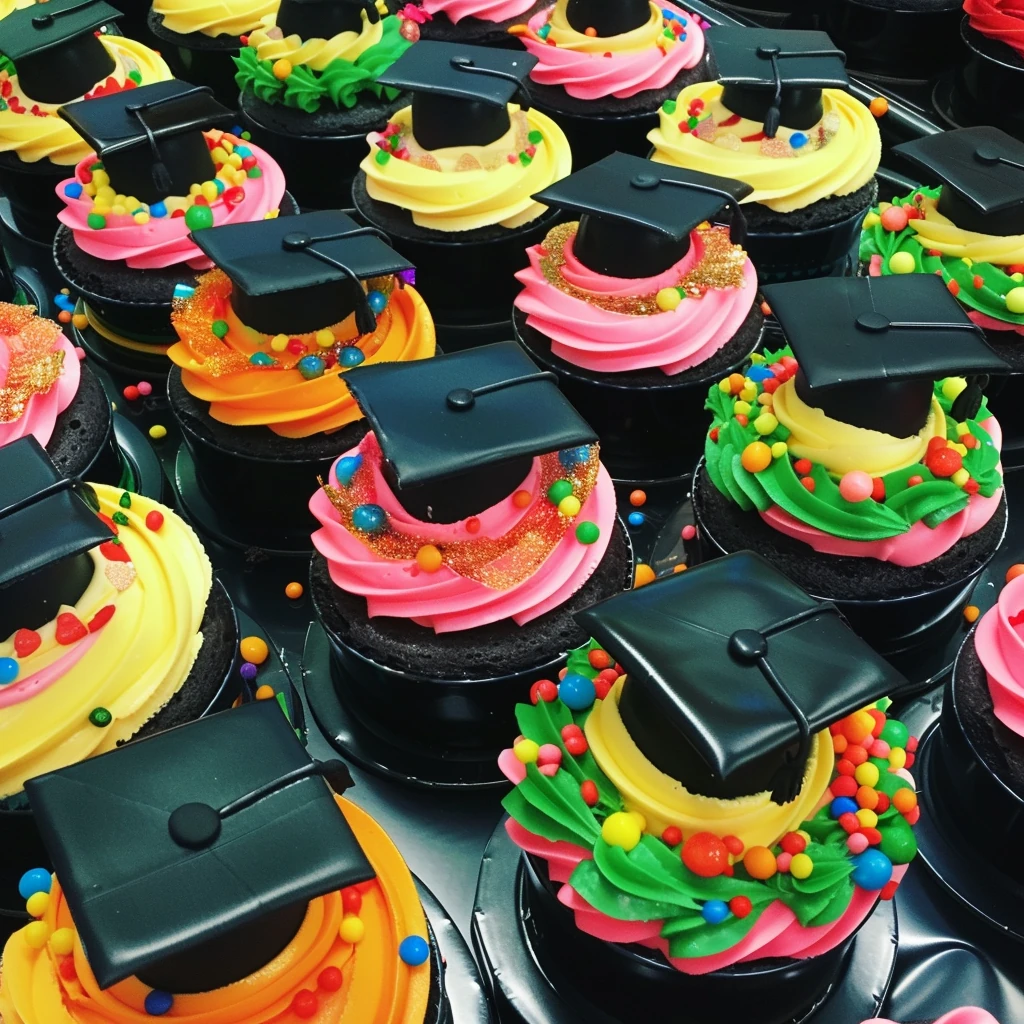
Graduation Bento Cakes: The Cutest Way to Celebrate Your Grad’s Big Achievement
Graduation season is a whirlwind of emotions and celebration—what better way to mark your grad’s milestone than with charming, personalized Graduation Bento Cakes? These mini cakes are all the rage: adorable, utterly customizable, and perfect for honoring the journey from student to graduate. Whether you’re hosting a backyard bash, a virtual commencement party, or just want to surprise your favorite scholar, Graduation Bento Cakes elevate any graduation table with charm and color. In this post, you’ll discover the art of making these highly Instagrammable cakes, packed with strategic tips, creative filling ideas, and pro-level decorating secrets. Let’s dive into everything you need to know to create show-stopping Graduation Bento Cakes for your next celebration—the perfect centerpiece for a new chapter’s sweet beginning.
Why You’ll Love Graduation Bento Cakes
- Mini and Mighty: These cute 4-inch cakes make a big impact in a small package—ideal for gifting or party favors.
- Customizable: Use your grad’s school colors, favorite flavors, and even add their name for a truly special touch.
- Eye-Catching Decor: Delectable buttercream, vibrant sprinkles, and trendy toppers make each cake a photo-worthy masterpiece.
- Make-Ahead Friendly: Batch baking and freezing means less stress on party day.
- Perfectly Portion Controlled: No messy cake slices—everyone gets their own unique, personal-sized treat.
- Memorable Keepsake: These cakes add a heartfelt, homemade element to your graduation festivities.
Ingredients for Graduation Bento Cakes
Preparing Graduation Bento Cakes is all about balancing flavor and aesthetics in a compact form. Here’s an ingredient list that will guarantee your mini cakes are delicious, fresh, and visually captivating:
- All-purpose flour: The backbone for soft, fluffy cake layers.
- Baking powder and baking soda: For that perfect rise—no dense bento cakes here.
- Granulated sugar: Sweetness in every bite, essential for both cake and buttercream.
- Unsalted butter: Contributes to rich flavor and a melt-in-your-mouth texture.
- Eggs: For structure and moisture.
- Whole milk or buttermilk: Adds tenderness to the crumb.
- Pure vanilla extract: Brightens the flavor—choose high-quality for the best results.
- Sea salt: Enhances all those sweet notes and keeps everything balanced.
- Food coloring gels: Essential for customizing buttercream to match school colors or any festive theme.
- Powdered sugar: Ensures smooth, creamy buttercream.
- Heavy cream: Helps create the perfect piping consistency for buttercream details.
- Sprinkles, edible glitter, or sanding sugars: For eye-catching decoration and a delightful crunch.
- Chocolate melts or fondant: Perfect for forming mini graduation caps and edible toppers.
- Edible markers (optional): For adding names, years, or messages on cake toppers.
- Flavor extracts (optional): Almond, lemon, or other extracts can give your cakes a signature twist.
- Filling options: Fruit jams, lemon curd, chocolate ganache, whipped cream, or even flavored buttercreams to layer between cake layers.
With these ingredients, you’ll be able to build Graduation Bento Cakes that are not just pretty, but also bursting with flavor, texture, and personality.
Necessary Tools
For the picture-perfect Graduation Bento Cakes experience, having the right tools at your side is crucial. Here’s what you’ll need to achieve bakery-worthy mini cakes at home:
- 4-inch cake rings or cleaned (and label-free) tuna cans: Essential for creating consistent, perfectly round mini cake layers.
- Stand mixer or electric hand mixer: Helps you whip up fluffy cakes and silky-smooth buttercream.
- Baking sheets and parchment paper: For even, stress-free baking and easy cake release.
- Mixing bowls: For wet and dry ingredients, plus extra for color mixing.
- Sifter: For aerating flour and powdered sugar—no lumps allowed.
- Offset spatula and cake scraper: To achieve neat, professional finishes even on small cakes.
- Tiny piping tips and piping bags: For intricate detailing, lettering, and border work.
- Food-safe gloves: Keeps colors vibrant and your hands clean during decorating.
- Cooling rack: Cools cakes evenly and prevents soggy bottoms.
- Freezer-safe airtight containers: For chilling and storing cakes at various stages.
- Good lighting: Crucial for precision decorating and capturing those social media-worthy photos.
- Custom toppers: Whether store-bought or homemade, name toppers and tiny graduation caps make each cake unique.
- Edible markers (optional): Great for personalizing toppers.
- Toothpicks: Helpful for swirling colors, testing doneness, or anchoring decorations.
Armed with these tools, you’ll breeze through the bento cake process from baking to decorating to presentation.
Ingredient Additions & Substitutions
Part of the magic behind Graduation Bento Cakes is how easily they can be tailored to your grad’s palate and dietary needs. Here’s how to put your own spin on the classics:
- Flour Alternatives: For a gluten-free version, swap the all-purpose flour for a gluten-free 1:1 baking mix. Almond or coconut flour can also add unique flavor and texture, but you may need to adapt liquid ratios slightly.
- Dairy-Free Options: Substitute the butter with vegan butter or coconut oil and use plant-based milk (such as almond, oat, or soy). Many non-dairy butters work beautifully for both cake and buttercream.
- Egg Substitutes: If baking for someone with egg allergies or following a vegan diet, use commercial egg replacers, or create a flax egg (1 tbsp ground flaxseed + 2.5 tbsp water per egg). Silken tofu or unsweetened applesauce can also help bind cakes without affecting flavor.
- Sugar Swaps: Reduce sugar by using coconut sugar or maple sugar, though they will bring subtle caramel notes and a slightly darker color to the cake. Stevia blends can be used for a lower-sugar option—just check package conversion instructions.
- Buttercream Variations: For more adventurous flavor or color combinations, try adding flavored extracts (orange, lemon, almond) or freeze-dried fruit powders for natural hues. Swiss meringue or cream cheese frostings work as delicious alternatives to classic American buttercream.
- Nut-Free Adaptations: Be mindful of toppings—skip nut-based decorations in favor of colorful jimmies, nonpareils, or edible glitter for safe, allergen-friendly flair.
- Filling Creativity: Graduation Bento Cakes are an open canvas. Go beyond classic strawberry jam with layers of lemon curd, passionfruit, salted caramel, dark chocolate ganache, or whipped mascarpone.
- Coloring Choices: Invest in high-quality gel or paste food colorings instead of liquid for the most vibrant, true-to-school-colors buttercream.
- Toppers: Make your own fondant or chocolate graduation caps, or source edible images and custom acrylic picks from online bakeries.
With these adaptation tips, you can ensure every guest—no matter their dietary preferences—can bite into a truly memorable Graduation Bento Cake.
How to Make Graduation Bento Cakes
Making Graduation Bento Cakes is a joyful, creative process, perfect for those who love a baking project that’s as fun to decorate as it is to eat! These delightful minis require some planning and precision, but the end result is worth every step.
Step 1: Prepare Cake Layers
Preheat your oven to 350°F (175°C) and line a baking sheet with parchment paper. Mix your dry ingredients (flour, baking powder, salt) in one bowl, and beat together the butter and sugar in another until pale and fluffy. Incorporate eggs one at a time, followed by vanilla. Alternate adding dry ingredients with milk, mixing just until combined for a tender crumb. Pour the batter into the prepared sheet for even thickness. Bake for 15-18 minutes or until a toothpick comes out clean. Cool completely.
Step 2: Cut and Layer Mini Cakes
Once your cake sheet is completely cool, use your 4-inch ring molds or cleaned tuna cans to punch out cake rounds. Aim for three layers per mini cake, trimming domes for even stacking if needed. Stack layers with your chosen fillings—fruit jam, ganache, or buttercream—between each for flavor and moisture. Lightly press to set.
Step 3: Crumb Coat and Chill
Apply a thin layer of buttercream over each cake to seal in crumbs and create a smooth base for final decoration. Place the cakes in the freezer for at least 30 minutes—this firm foundation makes intricate decorating much easier and keeps cakes stable during piping.
Step 4: Color and Prepare Buttercream
Divide your buttercream into bowls, tint each with gel food coloring to match school colors or the celebration theme. Fit your piping bags with your desired tips—petal tips for ruffles, round or star tips for borders and details. Practice a few borders or swirls on parchment paper if you’d like.
Step 5: Decorate and Add Toppers
Pipe vibrant borders, write congratulatory messages, or create fun motifs with your colored buttercream. Add decorative sprinkles, edible glitter, and gently press in fondant or chocolate graduation caps, name toppers, or edible images. Personalize each cake for individual grads or stack them for a showstopping display.
Step 6: Display and Serve
Arrange the finished Graduation Bento Cakes in bento-style boxes lined with a square of parchment or cupcake liner for easy transport. Serve chilled or at room temperature for the best flavor and texture.
Serving Suggestions
Graduation Bento Cakes are as versatile in presentation as they are in flavor. Serve each cake in a clear window box tied with a ribbon in school colors for a polished, professional appearance—perfect as party favors or graduations gifts. For a crowd, arrange the cakes on a tiered stand, grouping by color or flavor for an eye-catching dessert table. To personalize each moment, include custom tags, handwritten notes, or photos of the graduate on each box. Pair these miniature cakes with sparkling punch, coffee, or celebratory champagne for a toast-worthy finale. They’re also perfect for picnics, micro-celebrations, or as a sweet treat to drop off for loved ones you can’t be with in person.
Pro Tips & Tricks
- Bake Ahead: Bake and freeze your cake layers in advance for stress-free assembly during busy graduation weeks.
- Sharp Tools: Use well-greased cake rings or cleaned tuna cans for flawless, even rounds—chill cake slightly for cleaner cuts.
- Crumb Control: Always crumb coat and chill before final decorating; this keeps colors crisp and decorations pristine on these small canvases.
- Vibrant Colors: Use gel or paste food coloring instead of liquid—more vibrant hues, no risk of runny buttercream.
- Practice Piping: Before decorating your cakes, practice borders and lettering on parchment paper for perfect results.
- Small Batch Buttercream: For maximum freshness, mix your buttercream in smaller batches, coloring as needed for each design.
- Clean Edges: Wipe your offset spatula between spreads to avoid color mixing and streaks on the final cake.
- Secure Toppers: Use a little extra buttercream as “glue” to hold grad caps and custom toppers in place.
- Presentation Matters: Line boxes with parchment for easy removal and extra flair—add confetti or message tags for extra celebration points.
- Taste Test: Always taste your fillings and buttercream as you go; mini cakes mean every bite counts for big flavor.
Storage Instructions
To keep Graduation Bento Cakes fresh and beautiful until the big day, follow these storage guidelines: After decorating, transfer each mini cake into an airtight container or bento-style box. Place a layer of parchment between cakes if stacking. Store in the refrigerator for up to 4 days—bring to room temperature about 30 minutes before serving for the best texture and flavor. Buttercream seals in moisture, preventing the cakes from drying out. For longer storage, freeze undecorated cake rounds for up to a month; thaw and decorate as needed. Avoid freezing decorated cakes with fondant or sprinkles, as colors may bleed. Add toppers just before gifting.
General Information
- Difficulty Level: High-intermediate—ideal for bakers with some experience, but a great project for adventurous beginners.
- Yield: Typically 6-8 mini cakes from one standard sheet cake, depending on thickness and ring/can size.
- Preparation Time: Plan to bake, cut, and fill on separate days for the easiest process; allow 3 days for the full experience.
- Customizable: Themes, flavors, and decor can be adapted to every school or grad.
- Allergen-Friendly: Easily made gluten-free, dairy-free, or nut-free to accommodate party guests.
- Perfect for: Graduation parties, celebrations, teacher thank-you gifts, and memory-making events big or small.
FAQs
Can I use boxed cake mix for Graduation Bento Cakes?
Absolutely! A high-quality boxed mix can save time—simply bake the batter in a thin sheet and follow the same assembly and decorating steps as with homemade cake.
How do I make the graduation cap toppers?
DIY by shaping fondant or melting chocolate into small squares and rounds; use a dab of icing to attach a licorice “tassel” or pipe a buttercream tassel for a custom look.
Can these be made gluten-free or vegan?
Yes! Use a gluten-free all-purpose or vegan cake and buttercream recipe. Plant-based and allergen-friendly options adapt well to the bento cake technique.
How far in advance can I make Graduation Bento Cakes?
You can bake and freeze the cake layers up to a month ahead. Buttercream and assembly can be done 1-2 days before serving; add final decorations the day of for best freshness.
What’s the best way to transport Graduation Bento Cakes?
Use sturdy bento boxes with secure lids, line with parchment, and chill well before transport. This keeps cakes intact and decorations looking fresh for party time.
Can I fill the cakes with ice cream or mousse?
For a festive twist, yes! Just keep chilled until just before serving—mini cakes can be customized with mousse, curd, or even a layer of ice cream.
Conclusion
Graduation Bento Cakes are miniature works of art and celebration rolled into one—customizable, delicious, and endlessly fun to make. Whether you’re baking for a special graduate or turning tradition into a new family ritual, these cakes guarantee smiles, photos, and unforgettable bites. With the right prep, creative flair, and a little practice, anyone can master the art of the graduation bento cake. Here’s to sweet success at every milestone!
Nutritional Information
Each Graduation Bento Cake (approx. 4-inch round, with standard buttercream and basic filling) contains roughly:
- Calories: 350-420 per cake, depending on filling and decoration.
- Carbohydrates: 48-55g (mainly from flour, sugar, and buttercream)
- Protein: 3-5g (from flour and eggs)
- Fat: 15-22g (from butter, eggs, and cream)
- Sugars: 29-38g (from cake, buttercream, and toppings)
- Fiber: 0.5-1.5g (depending on add-ins like fruit/jam)
Exact nutrition will vary by recipe choices and decoration specifics. To lower calories or sugar, opt for lighter buttercream, less filling, or use fruit-based sweeteners. Enjoy Graduation Bento Cakes as a treat to mark this momentous occasion—every bite is a sweet reward for a job well done!
Print
Graduation Bento Cakes: Mini Celebration Cakes for Graduates
- Total Time: 1 hour 30 minutes (plus chilling/overnight time)
- Yield: 8 mini cakes
Description
Graduation Bento Cakes are delightful mini celebration cakes baked in 4-inch rings and beautifully decorated with colorful buttercream, piped details, and custom toppers featuring graduates’ names. Ideal for gifting or party favors, these cakes involve a three-day process to ensure stable layers and intricate decoration, offering a charming and personalized dessert for graduation festivities.
Ingredients
- Cake batter for two 8-inch cakes (your preferred flavor)
- Buttercream frosting, various colors (about 3 cups total)
- Custom cake toppers with graduates’ names
- 4-inch cake rings or thoroughly cleaned tuna cans
- Sprinkles or edible décor (optional)
Instructions
- Prepare your favorite cake batter and bake it in two 8-inch round pans as per your chosen recipe.
- Allow the cakes to cool completely. Wrap and refrigerate overnight for easy handling.
- The next day, use 4-inch cake rings or cleaned tuna cans to cut out mini cake rounds from the larger cakes.
- Stack cake rounds with a layer of buttercream between each. Apply a light crumb coat to each mini cake.
- Freeze assembled cakes for at least 30–60 minutes to firm up and make decorating easier.
- On the final day, use piping bags fitted with fine tips and various colored buttercream to decorate cakes according to the graduation theme.
- Personalize with custom toppers and additional edible decorations as desired.
- Allow cakes to sit at room temperature for 10–15 minutes before serving.
Notes
For gluten-free cakes, substitute all-purpose flour with gluten-free blend. Swap buttercream for whipped cream or vegan frosting if needed. Bake and freeze layers up to a week in advance; decorated cakes stay fresh in the fridge for 2–3 days, covered. Let cakes thaw before decorating to prevent smudging. If buttercream is too stiff, add a bit of milk; if cakes appear dry, brush with simple syrup. ALWAYS scale down recipes for mini cakes to avoid waste.
- Prep Time: 1 hour
- Cook Time: 30 minutes
- Category: Dessert
- Method: Baking
- Cuisine: American