
Easy Pickled Okra: 4 Remarkable Reasons You’ll Love This Happy Snack
Craving a crunchy, spectacular snack that bursts with flavor and charm? This Easy Pickled Okra recipe will become your new go-to for homemade, crowd-pleasing pickles. With just a handful of simple ingredients, you can craft 4 pints of tangy, vibrant okra in under an hour. Prepare to be delighted—whether you’re a canning enthusiast or an adventurous snacker, these pickled gems will leave you feeling happy and fully satisfied! For more easy recipes, see our Easy Ultimate Baked Beans for tasty inspiration.
Why You’ll Love Easy Pickled Okra
- Creates a happy, festive snack or unique side in only 45 minutes
- Delivers a spectacular crunch and sensational flavor in every bite
- Impressive make-ahead option for picnics, gatherings, or quick snacking
- Simple, reliable recipe—delight both beginners and seasoned canners alike
Ingredients for Easy Pickled Okra
Making remarkable Easy Pickled Okra begins with fresh, high-quality produce and a blend of vibrant spices. Here’s what you’ll need for this tangy, homemade sensation:
- 1 pound fresh okra, washed and trimmed – These bright green pods offer tantalizing crunch and cheerful color.
- 2 cups white vinegar – Gives the pickling brine its classic, punchy zip.
- 2 cups water – Helps mellow the vinegar’s intensity for a balanced flavor.
- 1/4 cup canning salt or kosher salt – Ensures a reliable, tasty brine without additives.
- 2 tablespoons sugar – Adds a subtle, uplifting sweetness to every bite.
- 4 cloves garlic, peeled – Blissfully aromatic; infuses the okra with savory depth.
- 2 teaspoons dill seeds – Provides an unmistakable, fragrant kick.
- 2 teaspoons mustard seeds – Adds cheerful tang and a touch of complexity.
- 1 teaspoon peppercorns – Lively spice that amplifies the sensory appeal.
- 1 teaspoon red pepper flakes (optional) – For those who crave a fiery, spirited twist.
- 4 sprigs fresh dill – Delivers another layer of tempting aroma and flavor.
- 4 pint-sized canning jars with lids and bands – Essential for safe, successful canning.
Together, these ingredients create a flavor-packed snack that’s uplifting and satisfying for any occasion.
Necessary Tools
To achieve the best results with your Easy Pickled Okra, gather these sturdy, helpful tools before you begin:
- Large stockpot or canning pot: Provides enough room for boiling water to sterilize your jars and safely process the pickles.
- Canning tongs or jar lifter: Essential for safely handling hot jars during the canning process.
- Canning funnel: Makes pouring hot brine into jars quick and mess-free.
- Clean kitchen towels: Wipe away excess moisture and keep your setup organized.
- Measuring cups & spoons: Ensure accurate proportions for consistent, flavorful pickles.
- Ladle: Easily scoops and pours the brine over the okra.
- Sharp paring knife: Trims okra stems smoothly and precisely for a superior texture.
- Timer: Keeps your process on track from start to finish.
- Bubble remover or chopstick: Releases trapped air inside the jars for perfect pickling.
Using the right tools ensures a safe, straightforward, and enjoyable canning experience—perfect for those wishing to try their hand at home preservation.
Ingredient Additions & Substitutions
The beauty of Easy Pickled Okra lies in its versatility. If you’re craving a fresh twist or need flavorful substitutions, try these vibrant options:
- Spice it up! Swap or combine your favorite spices for a custom flavor. Cumin seeds, coriander, or fennel lend surprising depth. For a classic Southern kick, add a pinch of smoked paprika.
- Adjust the heat. If fiery snacks thrill you, toss in extra red pepper flakes or a sliced jalapeño. Prefer your pickles milder? Omit the pepper flakes and savor the gentle zing of dill and garlic.
- Swap the vinegar. If white vinegar feels too bold, try apple cider vinegar for a softer, more complex tang. Rice wine vinegar lends a delicate, slightly sweet finish—ideal for playful experimentation.
- Change the herbs. While fresh dill is classic, try bay leaves or tarragon for a distinctive aroma. Even a sprig of rosemary packs a punch!
- Sugar tweak. For a richer, mellow sweetness, use brown sugar or honey instead of white sugar—just ensure it dissolves fully in the brine.
- Garlic boost. Craving sharper flavor? Add extra cloves, or lightly crush the garlic for a more pronounced, aromatic infusion.
- Jar size flexibility. Don’t have pint jars on hand? Half-pint jars are fantastic for smaller batches or gifting to friends and family.
- Okra alternatives. While okra is the star here, this crave-worthy brine also transforms green beans or carrots into spectacular pickled treats.
For more inspiration on making the most of garden-fresh veggies, take a peek at our Easy Cheesy Zucchini Bake, which provides another decadent way to enjoy summer produce.
How to Make Easy Pickled Okra
There’s nothing quite like the surge of satisfaction that comes from crafting your own vibrant, crispy pickles at home. Here’s how to make Easy Pickled Okra with step-by-step clarity—your jars will be brimming with flavor before you know it.
Step 1: Prepare and Sterilize Jars for Superior Freshness
Fill your canning pot with water and bring it to a boil. Using canning tongs, carefully place your jars and lids inside. Let them boil for 10 minutes to create a pristine, safe environment for your okra. Set aside on a towel to cool, keeping the atmosphere clean and organized.
Step 2: Wash & Trim Okra for Maximum Crunch
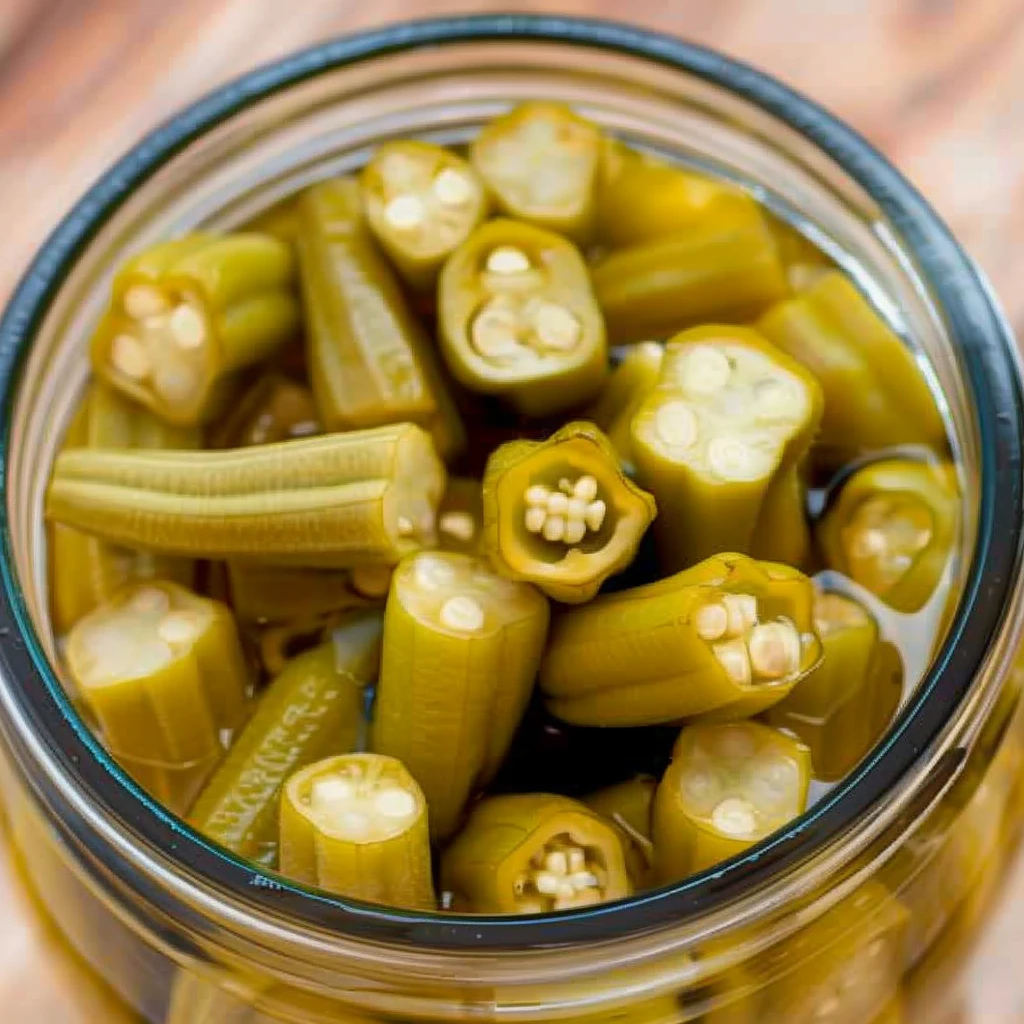
Rinse your fresh okra pods under flowing water, gently cleaning away dirt. Use a sharp paring knife to trim the stems—leave the caps intact. This ensures the signature look and bite-sized appeal that makes every jar visually stunning.
Step 3: Create Vibrant Brine
In a large pot, blend the white vinegar, water, canning salt, and sugar. Stir over medium-high heat until the salt and sugar dissolve completely, then allow the mixture to reach a vigorous boil. Breathe in the happy aroma—this savory-sweet brine is the secret to your okra’s irresistible flavor.
Step 4: Layer Flavors: Pack Jars with Spices & Fresh Okra
Distribute garlic, dill seeds, mustard seeds, peppercorns, red pepper flakes, and a sprig of fresh dill at the bottom of each sterilized jar. Stand the trimmed okra upright in the jars, arranging them closely to maximize the vibrant, appetizing visual.
Step 5: Pour and Finish the Magic
Using a ladle and canning funnel, pour the piping hot brine over the okra, leaving about 1/2 inch of headspace. Slide a bubble remover or chopstick around the inside edges to release trapped air—ensuring your pickles stay fresh and crisp. Wipe jar rims with a clean towel, then place lids and screw bands fingertip-tight.
Step 6: Process to Perfection
Using canning tongs, lower your jars into the boiling water bath. Set your timer for 10 minutes—this crucial step safely locks in flavor and crunch. When time is up, use tongs to remove jars and let them cool, undisturbed, for 12-24 hours.
Step 7: Savor the Triumph
Check seals by pressing the center of each lid—it should not flex. Label your jars and store in a cool, dark place, anticipating the joy of opening your own homemade pickled okra.
How to Serve Easy Pickled Okra
Easy Pickled Okra adds a vibrant, happy touch to any table spread! Enjoy these crispy delights straight from the jar whenever you crave a refreshing snack, or elevate your charcuterie boards with their striking color and texture. They make a sensational addition to salads, sandwiches, or even on top of burgers for a zesty crunch. For brunch, garnish your favorite Bloody Mary for a surprising, tantalizing twist, or serve alongside grilled meats for a joyful pop of flavor. However you enjoy them, these pickles turn the ordinary into the spectacular!
Pro Tips & Tricks
To maximize your homemade pickled okra’s flavor and crunch, try these proven, practical secrets:
- Always use the freshest okra available for the most lively texture and taste.
- Trim, but do not slice, the okra’s caps—this retains their appealing look and keeps brine from seeping inside too quickly.
- When packing jars, stand okra upright for a neat and visually impressive presentation.
- For flavor variety, try splitting your batch: add extra garlic or herbs to half, or test out bold spices like cumin or coriander.
- Store pickles in the back of your pantry or refrigerator, away from light, for steady preservation.
- If you’re new to canning, set all your tools and ingredients out before starting—everything goes more smoothly and confidently!
- Want more easy crowd-pleasers? Explore our Easy No-Knead Artisan Bread Recipe for another simple, handmade triumph.
Storage Instructions
For long-lasting freshness and maximum enjoyment, keep your sealed jars of Easy Pickled Okra in a cool, dark cupboard or pantry. Once opened, move the jar to your refrigerator and enjoy within four weeks for spectacular crunch and tempting flavor. Always use a clean utensil to remove pickles, which preserves quality and safety. If any jar fails to seal after processing, refrigerate immediately and consume within two weeks.
General Information
Pickling is an age-old technique that transforms everyday produce into exciting, shelf-stable treats packed with flavor. Okra, known for its vibrant green hue and distinctive crunch, is a Southern favorite for pickling. When combined with dill, mustard seed, and spicy pepper flakes, you create a pickle that’s outstanding for snacking, potlucks, or special occasions. Whether this is your first time canning or you’re a devoted enthusiast, Easy Pickled Okra is a project that promises both happiness and flavorful results for all ages.
FAQs
What’s the easiest way to prevent slimy okra in pickles?
Making sure your okra is fresh and avoiding overcooking during the canning process will maintain the fantastic, crisp texture every time. Standing the pods upright in the jar also helps keep them crunchy.
Can I use frozen okra instead of fresh for this recipe?
Fresh okra is crucial for superior texture and results, as frozen pods may become mushy during pickling. If fresh is unavailable, try a different hearty veggie like green beans or carrots.
How spicy do pickled okra turn out with red pepper flakes?
The heat is mild and balanced—just enough to add a hint of thrill. For truly fiery pickles, add more red pepper flakes or a slice of fresh chili to each jar.
How long should I wait before tasting my pickled okra?
For the best, most vibrant flavor, let your pickles rest at least 3 days after canning. The longer you wait, the more intense and tempting the flavor becomes!
What to Serve With Easy Pickled Okra
Easy Pickled Okra is wildly versatile and joyful on any snack platter. Serve them alongside grilled sausages, barbecue ribs, or fried chicken for a vibrant Southern feast. They sparkle as a snack with sharp cheddar, creamy dips, or olives. Add them to cheese boards, picnic baskets, or lunchboxes for a splash of color and tart, lively crunch. For a full spread of easy recipes, pair with Easy Baked Chicken and Zucchini – 5 Reasons You’ll Crave This! or whip up a batch of Easy Ultimate Baked Beans as delectable companions.
Conclusion
If you’re searching for a satisfying, accessible way to enjoy the bounty of fresh okra, Easy Pickled Okra offers a triumphant, cheerful solution. Every jar opens a world of bright flavor and satisfying snap—making your homemade pickles the star of snacks, sides, and celebrations alike!
Nutritional Information
Easy Pickled Okra delivers a pleasingly light, low-calorie snack or side. It’s naturally free from preservatives, connects you to your ingredients, and may provide beneficial fiber and vitamins thanks to fresh okra’s nutritious profile. Enjoy these spectacular pickles guilt-free as a tangy addition to your menu!
PrintPickled Okra – Easy Pickled Okra Recipe
- Total Time: 45 minutes
- Yield: 4 pints
Description
Pickled Okra is a crisp, tangy Southern favorite, made by preserving fresh okra in a seasoned vinegar brine. This straightforward recipe lets you achieve crunchy pickled okra with garlic, dill, mustard, and a hint of spice from red pepper flakes. It delivers perfectly preserved jars for snacking, garnishing, or including in relish trays. Ideal for canners and pickle lovers seeking a reliable homemade method.
Ingredients
- 1 pound fresh okra, washed and trimmed
- 2 cups white vinegar
- 2 cups water
- 1/4 cup canning salt or kosher salt
- 2 tablespoons sugar
- 4 cloves garlic, peeled
- 2 teaspoons dill seeds
- 2 teaspoons mustard seeds
- 1 teaspoon peppercorns
- 1 teaspoon red pepper flakes (optional)
- 4 sprigs fresh dill
- 4 pint-sized canning jars with lids and bands
Instructions
- Sterilize the canning jars and lids by boiling them in water for 10 minutes.
- Wash the okra thoroughly and trim the stems, leaving the caps intact.
- In a large pot, combine the vinegar, water, salt, and sugar. Bring to a boil, stirring to dissolve.
- Place garlic, dill seeds, mustard seeds, peppercorns, red pepper flakes, and fresh dill into each sterilized jar. Pack okra standing upright.
- Pour hot brine over okra, leaving about 1/2 inch headspace. Remove air bubbles.
- Wipe jar rims, place lids and screw bands fingertip tight.
- Process in boiling water bath for 10 minutes.
- Cool undisturbed for 12-24 hours. Check seals and store in cool, dark place.
Notes
For a milder flavor, omit red pepper flakes. Substitute apple cider vinegar for white vinegar for a fruitier taste. Use jarred dill if fresh isn’t available, or celery seeds in place of dill seeds. Pickled okra can be made ahead and will keep for up to a year if stored in a cool, dark place. Always ensure lids seal properly; unsealed jars should be refrigerated and used within 2 weeks. If brine clouds or pickles soften, review sterilization and sealing steps.
- Prep Time: 35 minutes
- Cook Time: 10 minutes
- Category: Preserves
- Method: Canning
- Cuisine: Southern