
Discover the joy of making Japanese Katsu Bowls with Tonkatsu Sauce — a recipe designed to thrill your taste buds and bring a feast of flavors to your table. With crispy chicken thighs paired perfectly with savory tonkatsu sauce and fluffy sushi rice, this dish promises a soul-satisfying experience. If you love this recipe, you’ll also enjoy our 7 Amazing Happy Easy Moist Pumpkin Bread that brings warmth and happiness to your kitchen!
Why You’ll Love Japanese Katsu Bowls with Tonkatsu Sauce
- Enjoy a spectacular blend of crunchy textures and bold, flavorful sauce.
- Experience a thrilling harmony of umami flavors that make every bite delightful.
- Quick and simple to prepare, it’s perfect for busy days yet feels like a special treat.
- Ready in just 45 minutes with simple ingredients you probably have on hand.
Ingredients for Japanese Katsu Bowls with Tonkatsu Sauce
This recipe uses fresh and vibrant ingredients to create a meal that feels both comforting and exciting. Tender, boneless chicken thighs coated in crispy panko breadcrumbs offer a satisfying crunch. The tonkatsu sauce, a rich and tangy blend of soy, Worcestershire, ketchup, and a hint of mirin, adds layers of practical and sensational flavor complexity. Steamed sushi rice acts as a soft, fluffy base that complements every bite, while the bright, crisp green onions sprinkled on top bring a fresh lift to the dish. These thoughtfully combined ingredients deliver both comfort and excitement in every mouthwatering bite.
Necessary Tools
- Reliable skillet for perfectly frying the chicken
- Essential saucepan to cook sushi rice flawlessly
- Three bowls to set up a simple but effective breading station
Having the right tools makes cooking Japanese Katsu Bowls with Tonkatsu Sauce faster and more enjoyable. A reliable skillet ensures the chicken gets its beautifully golden, crisp crust without absorbing excess oil. Meanwhile, a saucepan with a tight-fitting lid is crucial for preparing the sushi rice to a perfect, fluffy consistency. Setting up three separate bowls for flour, beaten eggs, and panko breadcrumbs simplifies the breading process, helping you achieve that irresistible crunch with ease and finesse.
Ingredient Additions & Substitutions
Feel free to customize this recipe to match your taste preferences or dietary needs. You can substitute chicken thighs with pork cutlets or even firm tofu for a vegetarian twist, each delivering stunning texture and flavor. If panko breadcrumbs are unavailable, crushed cornflakes or regular breadcrumbs work as well, though they offer a slightly different crunch. For the tonkatsu sauce, adding a splash of honey can create a pleasantly sweet undertone, or some chili flakes will provide a thrilling heat. To make it gluten-free, opt for gluten-free flour and breadcrumbs, and use tamari instead of soy sauce. Experimenting with these options can turn this dish into your very own captivating culinary masterpiece! To explore more happy and hearty recipes, don’t miss our 7 Terrific Happy Pumpkin Bread with Pumpkin Pie Filling—a great pairing for cozy meals.
How to Make Japanese Katsu Bowls with Tonkatsu Sauce
Crafting Japanese Katsu Bowls with Tonkatsu Sauce is a satisfying and joyful process that guarantees rich, tantalizing results. From perfectly cooking sushi rice to frying the chicken until golden and crispy, each step builds layers of flavor and texture. The velvety-tonkatsu sauce ties it all together, transforming simple ingredients into a vivid and uplifting meal experience.
Step 1: Master Sushi Rice Preparation
Rinse the sushi rice thoroughly under cold water until the water runs clear to eliminate excess starch. Combine the rice with 1.5 cups of water in a saucepan and bring to a boil. Once boiling, reduce to low heat, cover the saucepan, and simmer gently for 18-20 minutes until the rice is tender and fluffy. Fluff the rice with a fork right before serving to ensure the perfect texture that complements your katsu chicken.
Step 2: Prepare the Breading Station for Crunch
Arrange three separate bowls on your countertop: one filled with all-purpose flour, one with beaten eggs, and one with panko breadcrumbs. Dredge each boneless chicken thigh first in flour, coating it evenly. Next, dip the chicken into the beaten eggs, and finally, press into the panko breadcrumbs until fully coated. This meticulous breading technique guarantees a crunchy, golden crust with every piece.
Step 3: Achieve Perfectly Fried Chicken
Heat vegetable oil in a skillet over medium-high heat until shimmering. Carefully place the breaded chicken thighs in the hot oil and fry for 4-5 minutes on each side until they develop a deep golden-brown crust and a juicy interior. Maintain the oil temperature to avoid soggy coating and ensure that enticing crunch and unbeatable texture.
Step 4: Stir Up the Tangy Tonkatsu Sauce
In a small bowl, combine low-sodium soy sauce, Worcestershire sauce, ketchup, and mirin (if using). Whisk together until the ingredients meld into a glossy, tangy sauce that will crown your crispy chicken with irresistible flavor. This sauce is the heart of your katsu bowl, so take your time mixing for the best results.
Step 5: Assemble the Delightful Katsu Bowls
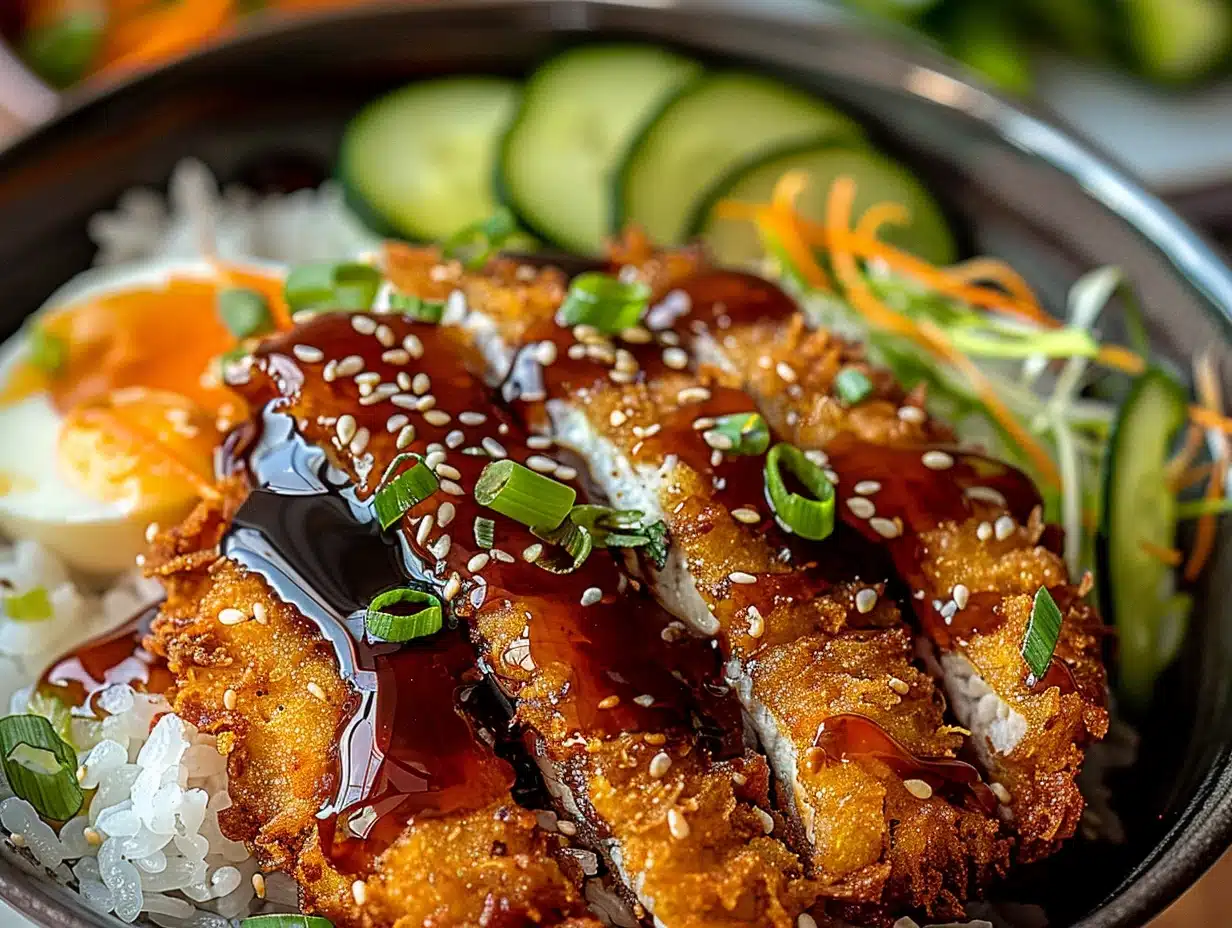
Divide the fluffed sushi rice evenly among serving bowls. Slice the fried chicken into thick strips and arrange them artfully on top of the rice. Generously drizzle the tonkatsu sauce over the chicken, letting it seep into every crevice. Finally, sprinkle chopped green onions for a lively, fresh finish that adds a pop of color and zest.
How to Serve Japanese Katsu Bowls with Tonkatsu Sauce
Serve these vibrant Japanese Katsu Bowls piping hot, allowing the luscious tonkatsu sauce to be the aromatic star of the meal. The layers of texture—from the crunchy chicken to the soft rice enriched by hints of fresh green onion—make each bite a happy sensation. Pair with crisp cucumber slices or a small salad to balance the meal with refreshing, clean flavors. This dish is sure to make your dining moments exciting and fulfilling.
Pro Tips & Tricks
For the best results, use fresh panko breadcrumbs—they cook faster and deliver a superior crunch. Maintain your oil temperature at medium-high to avoid greasy or undercooked chicken. Let the rested fried chicken sit briefly on paper towels after cooking to remove excess oil without sacrificing crispiness. To add an extra layer of savory richness, consider brushing the chicken lightly with melted butter before breading. Experiment with adding a splash of rice vinegar to your tonkatsu sauce for a tangy twist. For more delicious recipe inspiration, see our 7 Amazing Happy Best Moist Pumpkin Bread.
Storage Instructions
Store any leftover Japanese Katsu Bowls components separately in airtight containers to maintain freshness—the fried chicken will keep well in the refrigerator for up to 3 days. To reheat, warm the chicken in an oven or air fryer to regain its original crispiness, avoiding microwaves that can make it soggy. Sushi rice is best fresh but can be gently reheated covered to retain moisture. Tonkatsu sauce should be refrigerated and stirred before use to ensure consistency.
General Information
Japanese Katsu Bowls with Tonkatsu Sauce is a popular meal that brings the classic fried cutlet into a wholesome bowl experience. Popular across Japan and admired globally, this dish balances texture, crispiness, and umami flavors. Its simplicity, combined with vibrant taste and accessibility of ingredients, makes it a favorite choice for dinner ideas. The bowl format makes it ideal for easy portion control and customizable add-ons like vegetables or pickles, broadening its appeal for busy families and food lovers alike.
FAQs
Can I use other types of meat for Japanese Katsu Bowls?
Absolutely! While chicken thighs are classic, pork cutlets, turkey, or firm tofu can make excellent substitutes, offering diverse textures and flavors that retain the dish’s crunchy appeal.
Is it possible to make the dish gluten-free?
Yes, by opting for gluten-free flour and breadcrumbs along with tamari sauce instead of soy, you can enjoy this delicious meal without gluten concerns while maintaining its delicious qualities.
How do I get the chicken extra crispy?
Ensure the oil is hot enough before frying and avoid overcrowding the pan. Using panko breadcrumbs and frying in batches helps maintain the crisp texture that makes katsu so inviting.
Can I prepare parts of this recipe ahead of time?
Definitely! You can cook the sushi rice and prepare the tonkatsu sauce in advance. Fry the chicken fresh for best crispiness, but breaded chicken can be prepped earlier and fried just before serving.
What to Serve With Japanese Katsu Bowls with Tonkatsu Sauce
Complement the rich flavors of Japanese Katsu Bowls with crisp, refreshing sides such as a crunchy cucumber salad or steamed broccoli with a light drizzle of sesame oil. Miso soup is a soothing starter that pairs beautifully, enhancing the overall dining experience with warm, savory notes. For an added touch of delight, pickled vegetables or a simple coleslaw can provide textural contrast and balance to the succulent fried chicken. For more inspiring recipes that bring happiness to your table, try our 6 Amazing Happy Recipes for The Best Pumpkin Bread Moist Best.
Conclusion
With its vibrant crunch, robust sauce, and comforting rice, Japanese Katsu Bowls with Tonkatsu Sauce bring a thrilling and joyful dining experience to your home. Simple yet spectacular, this recipe invites you to enjoy a beautiful balance of texture and flavor that’ll keep you coming back for more.
Nutritional Information
This recipe offers a balanced meal with protein-rich chicken and nourishing sushi rice. Using lean chicken thighs and controlled oil for frying keeps the meal hearty yet not overly indulgent. The addition of green onions adds fresh vitamins and antioxidants, making the bowl both tasty and wholesome.
Print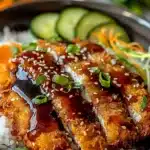
Japanese Katsu Bowls with Tonkatsu Sauce
- Total Time: 45 minutes
- Yield: 4
Description
Japanese Katsu Bowls with Tonkatsu Sauce feature crispy breaded chicken thighs fried golden brown and served over fluffy sushi rice. Topped with a savory, tangy homemade tonkatsu sauce made from soy sauce, Worcestershire, ketchup, and optional mirin for a perfect balance. Garnished with fresh green onions, this meal combines textures and flavors for a satisfying Japanese-inspired dish.
Ingredients
- 1 lb boneless chicken thighs
- 1 cup panko breadcrumbs
- 2 large eggs
- 1 cup all-purpose flour
- ½ cup tonkatsu sauce
- 1 cup sushi rice
- 2 green onions, chopped
- Vegetable oil for frying
- 3 tbsp low-sodium soy sauce
- 1 tbsp Worcestershire sauce
- 2 tbsp ketchup
- 1 tsp mirin (optional)
Instructions
- Rinse sushi rice until water runs clear. Combine with 1.5 cups water in a saucepan, bring to a boil, then cover and simmer for 18-20 minutes.
- Set up a breading station with flour, beaten eggs, and panko in separate bowls.
- Dredge chicken in flour, dip in eggs, then coat with panko.
- Heat vegetable oil in a skillet over medium-high heat.
- Fry chicken for 4-5 minutes per side until golden brown.
- Mix soy sauce, Worcestershire sauce, ketchup, and mirin to make the tonkatsu sauce.
- Fluff the rice and divide it among bowls.
- Slice the fried chicken and place it on top of the rice.
- Drizzle with tonkatsu sauce and garnish with chopped green onions.
Notes
For substitutions, chicken breasts can be used instead of thighs, though thighs remain juicier. Panko breadcrumbs provide essential crispiness; substitute with regular breadcrumbs for a softer crust. Tonkatsu sauce can be stored refrigerated up to 1 week. Make rice ahead and reheat with a splash of water to maintain fluffiness. Avoid overcrowding the pan to keep chicken crispy. Monitor oil temperature to prevent sogginess or burning.
- Prep Time: 20 minutes
- Cook Time: 25 minutes
- Category: Main Course
- Method: Frying
- Cuisine: Japanese