
3D Graduation Cap Cake: A Showstopping Centerpiece for Your Milestone Celebration
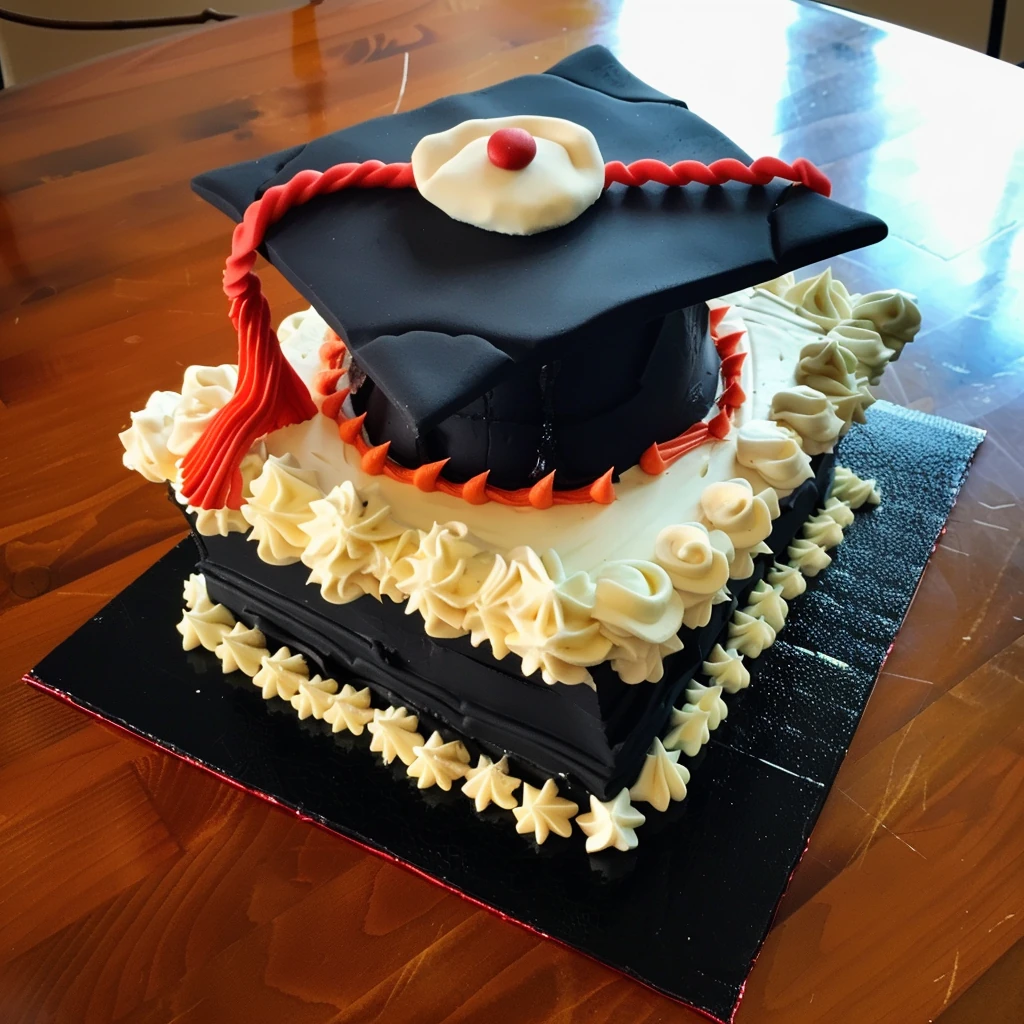
If you want to make your next graduation party legendary, look no further than the stunning 3D Graduation Cap Cake. This centerpiece dessert is a blend of artistry and classic baking—rich cake, decadent buttercream, glossy fondant, and a dash of engineering to bring the iconic grad cap shape to life. The first time my sister attempted this cake for her daughter’s ceremony, the result was so unique (let’s say gravity-defying) that we affectionately dubbed it “The Cake That Gravity Forgot.” Whether you’re a cake artist searching for your next challenge, or a parent looking to surprise your grad, this 3D Graduation Cap Cake delivers a memorable moment—design mishaps and all! This blog post will guide you step-by-step to create a cake worthy of tossing your cap in the air.
Why You’ll Love 3D Graduation Cap Cake
- Instantly transforms any graduation party into an unforgettable celebration
- Customizable to match your school colors or graduation theme
- Impressive centerpiece that doubles as a conversation starter
- Fun challenge for skilled bakers looking to up their cake game
- Satisfying blend of classic flavors, creamy buttercream, and show-stopping fondant details
Ingredients for 3D Graduation Cap Cake
Creating a successful 3D Graduation Cap Cake means using sturdy cakes, supportive fillings, and reliable decorating materials. Everything you need is listed below for a 10
- to 12-serving cake.
- Cake Layers: Use dense cakes that can handle carving and stacking. Good options include chocolate mud cake, pound cake, or classic vanilla sponge.
- 4 x 8” square cake layers (for cap base)
- 2 x 6” round cake layers (for cap dome)
- Buttercream:
- 3 cups unsalted butter, room temperature
- 7 cups powdered sugar
- 1/2 cup whole milk or heavy cream (as needed)
- 2 teaspoons vanilla extract
- Pinch of salt
- Fondant:
- 2 lbs black fondant (for cap covering and top panel)
- 8 oz red or school color fondant (for tassel and decorative trim)
- 4 oz white fondant (for button/optional accents)
- Internal Structure:
- 4 sturdy drinking straws or cake dowels (for stacking stability)
- 1 thin cardboard cake board (6″ round, for supporting the cap top)
- Decoration:
- Edible gel food coloring (as required for custom colors)
- Edible glue or water (to secure fondant decorations)
- Small edible pearl or jelly bean (for tassel button)
- For prepping & assembly:
- Cooking spray or parchment paper
- Cornstarch/powdered sugar (for rolling fondant)
- Cake syrup (optional, for brushing cake layers)
Necessary Tools
The right tools will make your 3D Graduation Cap Cake come together smoothly and safely. Here’s what you’ll need in your cake-decorating toolkit:
- 8″ and 6” cake pans (square and round respectively)
- Electric stand mixer or handheld mixer (for whipping buttercream to perfection)
- Large palette knife or offset spatula (for spreading and smoothing frosting)
- Serrated cake knife (for trimming and carving layers into sharp edges)
- Fondant rolling pin and nonstick mat
- Fondant smoother (to give the cap its crisp, polished look)
- Bench scraper (great for smoothing sides and getting clean lines)
- Small sharp knife or fondant cutter (for detailed work)
- Piping bag with star tip (for buttercream borders if desired)
- Cooling racks and pastry brush
- Ruler or measuring tape (for precise shaping)
- Turntable (optional, but a big help with even frosting and fondant application)
These tools support every step, from baking and layering to assembling the signature cap design. Invest in a few specialty tools, like a fondant smoother and dowels—they make all the difference for professional results!
Ingredient Additions & Substitutions
The beauty of the 3D Graduation Cap Cake is its adaptability in both flavor and style. Here’s how you can tailor it to meet any dietary\, flavor\, or celebration needs:
Cake Base
- For ultimate structure and ease of carving, use butter-heavy cakes like pound cake, chocolate mud cake, or sponge.
- Gluten-free cake mix can work well if you reinforce the cake with a slightly denser texture. Just add an extra egg or a tablespoon of xanthan gum.
- For a lighter option, angel food or chiffon cakes are possible, but they require more care and perhaps extra doweling for stability.
Buttercream Variations
- Swap regular butter for plant-based margarine to create a dairy-free version. Use oat milk or almond milk in place of cream.
- Try classic American buttercream for a sweet finish, or Swiss meringue buttercream for a silkier, less sweet alternative.
- Stabilize whipped cream frosting for a lighter, airier texture, but note it’s less supportive for heavy fondant work.
Fondant Options
- Don’t have black fondant? Tint white fondant with black gel coloring. Wear gloves to avoid stains!
- Marshmallow fondant is homemade and cost-effective; just beat mini marshmallows, powdered sugar, and a bit of water together.
- Modeling chocolate can be swapped in for fondant if you prefer a richer, less sweet covering.
Decorations and Structural Supports
- Tassel and button decorations can be made in any color—choose the graduate’s favorite for something personal.
- If you don’t have access to edible glue, water works in a pinch to adhere fondant elements.
- Wooden or plastic cake dowels are more traditional than drinking straws, but wide, food-safe straws are easy to find and safe for moderate cake heights.
Allergen-Friendly Adaptations
- Use egg replacer and vegan butter for an egg- and dairy-free cake.
- For nut allergies, ensure all pre-made ingredients are nut-free; check fondant brands and decorating extras.
With these ingredient swaps and ideas, your 3D Graduation Cap Cake can be as creative and inclusive as your celebration demands!
How to Make 3D Graduation Cap Cake
Ready to create a masterpiece? Making a 3D Graduation Cap Cake is all about structure, layers, and creative decorating. Here’s the complete process—from baking to presenting!
Step 1: Bake the Cakes
Start by preparing your cake layers. Bake four 8-inch square layers (for the base) and two 6-inch round layers (for the rounded cap section). Dense, butter-based batters are key: chill the cakes thoroughly after baking to make carving easier. Once cakes are cool, level the tops so every layer is flat and stack neatly.
Step 2: Prepare the Buttercream
While cakes cool, whip butter and sugar together using your stand or hand mixer until light and fluffy (about 5 minutes). Add vanilla and gradually blend in enough milk (or cream) to reach desired consistency. Keep a portion white for borders and decoration and color the rest black or another deep tone to match your school’s theme.
Step 3: Carve and Stack the Base
Trim two of the square cake layers to form a stackable, slightly smaller base that adds dimension to your cap. Layer with buttercream and insert straws or dowels for support. Place a cake board on top before adding the round “dome” section. This solves the common issue of “sinking caps”—which, as my sister can confirm, makes for memorable but lopsided dessert photos!
Step 4: Shaping the Cap Dome
Carve the 6-inch round cakes into a gentle dome. Use a serrated knife to softly bevel the edges for a smoother transition to the fondant. Apply a crumb coat of buttercream, chill, then repeat with a thicker final layer, smoothing with a bench scraper.
Step 5: Fondant Work
Dust a work surface with cornstarch. Roll black fondant to about 1/8-inch thickness. Drape carefully over the dome, smoothing with your hands and fondant smoother for a sleek cap effect. Roll another piece into a neat square for the cap top panel and press onto the round dome with a little edible glue or water.
Step 6: Finishing Touches
For the tassel: Roll thin ropes of colored fondant. Twist and flatten into tassel shape, attach with edible glue at the center of the cap, and finish with a white fondant button topped with a pearl or jelly bean. Use piping bags for creamy, celebratory borders and additional decorations as desired.
Step 7: Assembly and Presentation
Let the 3D Graduation Cap Cake chill to set details. Carefully transfer the finished cake to a sturdy serving board or platter. Add any final edible glitter, writing, or sprinkles—then step back and admire your gravity-defying creation!
Serving Suggestions
A 3D Graduation Cap Cake isn’t just a feast for the eyes—it’s meant to be shared and enjoyed. Serve thick slices with scoops of vanilla ice cream at your next grad party, or offer cold glasses of milk and coffee for parents and guests. Add a table of fresh berries, citrus slices, or a bowl of whipped cream to let folks customize each bite. If you’ve made a multi-flavored cake, display a sign so each grad can pick their favorite! For a truly interactive experience, arrange a topping station with fudge sauce, chopped nuts, or even edible confetti for a sweet send-off.
Pro Tips & Tricks
- Chill your cakes before carving. It makes detailed shaping much simpler and prevents crumbs from interfering with your frosting.
- Use a ruler and sharp serrated knife for precise cuts—graduation caps have sharp, defined angles!
- Always insert your internal supports (straws or dowels) after stacking but before adding fondant. This prevents collapse and gives your cake serious structure.
- If your fondant cracks, knead in a touch of vegetable shortening until smooth before rolling.
- Work quickly with black fondant to avoid drying or fading. Store unused pieces in sealed plastic while decorating.
- Buttercream borders cover up fondant seams and add celebratory flair. Don’t be afraid to get creative with piping tips and colors.
- If you’re a perfectionist, make a cardboard template for the cap’s top to ensure perfectly straight lines.
- Embrace the imperfections! The most memorable cakes are often the ones with a “homemade” touch—just ask my family about our lopsided cap saga.
Storage Instructions
Store your 3D Graduation Cap Cake in the fridge if you’re assembling ahead—ideally in a cake box or loosely covered to avoid fondant sweating. Fondant can gradually absorb moisture, so let the cake come to room temperature for 30-60 minutes before serving (this prevents condensation and sticky fondant). Leftover slices keep well, tightly wrapped, in the fridge for up to four days. If freezing, wrap each slice in plastic wrap, then foil, and freeze up to two months. Thaw wrapped in the fridge overnight for best flavor and texture.
General Information
The 3D Graduation Cap Cake is considered an advanced baking project, best suited for decorators who already have experience with fondant and tiered cakes. However, ambitious beginners are welcome—the learning curve just adds to the fun and memory-making process! This cake is ideal for medium-to-large gatherings, serving around 10-12 hearty slices. Allow a full afternoon for assembling, decorating, and troubleshooting (especially if this is your first time with internal supports). Plan to make the cake one or two days ahead of your event for optimal freshness and reduced stress.
FAQs
Can I make the 3D Graduation Cap Cake ahead of time?
Yes! Prepare the cake layers, assemble, and decorate up to two days before your event. Store in the fridge, then soften at room temp before serving for the best flavor and fondant texture.
What cakes work best for carving and stacking?
Dense, sturdy cakes like pound cake, chocolate mud cake, or moderately dense sponge cakes hold their shape and make carving much easier. Avoid very light or crumbly cakes, which can collapse under the weight of fondant.
I accidentally tore the fondant. How can I fix it?
Knead a tiny bit of vegetable shortening into the torn area and smooth gently with warm hands or a fondant smoother—seams disappear with a little patience!
Can I use colored buttercream instead of fondant?
Absolutely! While fondant gives the most authentic “cap” appearance, deeply colored buttercream can be smoothed and piped for a vibrant and still-recognizable cap design.
How do I keep my cake from sinking or collapsing?
Don’t skip the internal supports! Insert dowels or sturdy straws beneath the dome and board—this is essential for supporting heavy fondant and stacked layers.
Do I need special tools to make this cake?
While some specialty cake-decorating tools are helpful (fondant smoother, bench scraper, dowels), you can improvise with clean kitchen utensils in a pinch. As long as your supports are food-safe, you’re good to go!
Conclusion
The 3D Graduation Cap Cake is the ultimate showstopper for celebrating life’s big achievements. Whether you nail every detail or create a cake so memorable it gets a family nickname, you’ll delight your guests and create new traditions. Grab your spatula, channel your inner cake architect, and get ready to turn your grad’s milestone into a sweet masterpiece worth celebrating!
Nutritional Information
Serving size: 1/12 of cake
Approximate values (will vary depending on flavor and decorations chosen):
- Calories: 480-550
- Total Fat: 22-28g
- Saturated Fat: 12-16g
- Cholesterol: 70-90mg
- Sodium: 180-240mg
- Total Carbohydrates: 65-77g
- Dietary Fiber: 1-2g
- Sugars: 49-58g
- Protein: 3-6g
Remember: This cake is an occasional treat—suitable for celebrating big moments and new beginnings! Enjoy every milestone, one delicious slice at a time.
Print
Graduation Cap Cake: 3D Celebration Dessert
- Total Time: 1 hour 30 minutes
- Yield: 16
Description
This 3D Graduation Cap Cake is an impressive centerpiece for graduation parties, featuring meticulously carved cake layers stacked with internal supports and covered in smooth fondant to resemble a classic cap. Ideal for celebrations, it requires some advanced cake decorating skills and careful construction to ensure structural stability and a stunning, memorable presentation for your graduate.
Ingredients
- 2 9-inch round cake layers (flavor of choice)
- 1 8-inch square cake layer (flavor of choice)
- 2 cups buttercream frosting
- 1 pound black fondant
- 4 tablespoons corn syrup
- 1 cup powdered sugar (for dusting)
- 2 tablespoons water
- 1 yellow licorice lace or fondant rope (for tassel)
- 4–6 drinking straws or dowels (for internal support)
- Nonstick spray (for hands and tools)
- Edible gold or yellow gel (optional, for details)
Instructions
- Level and chill the cake layers. Use a serrated knife to carve the round cakes into a stacked dome (the base of the cap) and the square cake into a flat board shape (the top of the cap).
- Stack the two round cakes with buttercream between layers. Insert drinking straws or dowels evenly across the center to provide internal support.
- Apply a thin crumb coat of buttercream to the stacked dome and square layers. Refrigerate for 20 minutes to set.
- Roll out the black fondant on a powdered sugar-dusted surface until 1/4-inch thick. Drape it smoothly over the dome and over the square cap, trimming excess.
- Carefully position the squared fondant-covered cake atop the domed base, using additional dowels if needed for stability.
- Shape a small button and a tassel from yellow fondant or licorice lace. Attach to the center top of the square cap with corn syrup as edible glue.
- Finish by adding any desired gold or yellow painted details or writing with edible gel. Chill until serving.
Notes
For cake bases, any sturdy flavor like chocolate or vanilla works—use boxed mix for convenience. Fondant can be swapped for buttercream if desired, though shaping will be less precise. Prepare supports in advance and refrigerate layers for easier carving. Assemble cap on-site to avoid collapse. Leftovers keep up to 3 days, covered at room temp. If cakes sink or collapse, reinforce with more supports and chill between steps.
- Prep Time: 45 minutes
- Cook Time: 45 minutes
- Category: Dessert
- Method: Baking
- Cuisine: American